


Thank you for purchasing StellarMate X Controller! Please follow this guide before you starting using the unit for the first time.
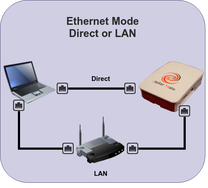
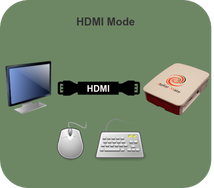
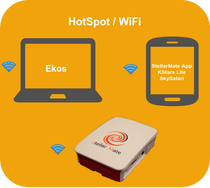
Stellarmate X allows the user to control/access their scope and camera from one of 4 kinds of devices: phone, tablet, laptop, or desktop. In each case both the user device and Stellarmate need to be connected to the same network. If you have a wired network available, both Stellarmate and your laptop/desktop would be connected to the same wired network. For phones and tablets, WiFi is used (and can be for laptop/desktop as well). For WiFi, either you have your own WiFi (in range for both your device and Stellarmate), or you both use the WiFi hot spot provided by Stellarmate (which shows as stellarmate).
Once connected, you use an app on your device for control/access. For phones and tablets this is usually the Stellarmate App. For laptop and desktop this is the KStars application. You define an equipment profile (that describes your connected scope gear) and connect to that for control.
After connection is established, you can do things like move the scope, enable tracking, GOTO specific objects in the sky, view camera images, take pictures of capture video, etc. The range of options here is extensive based on what gear you have available at the scope end.
1. Package Contents
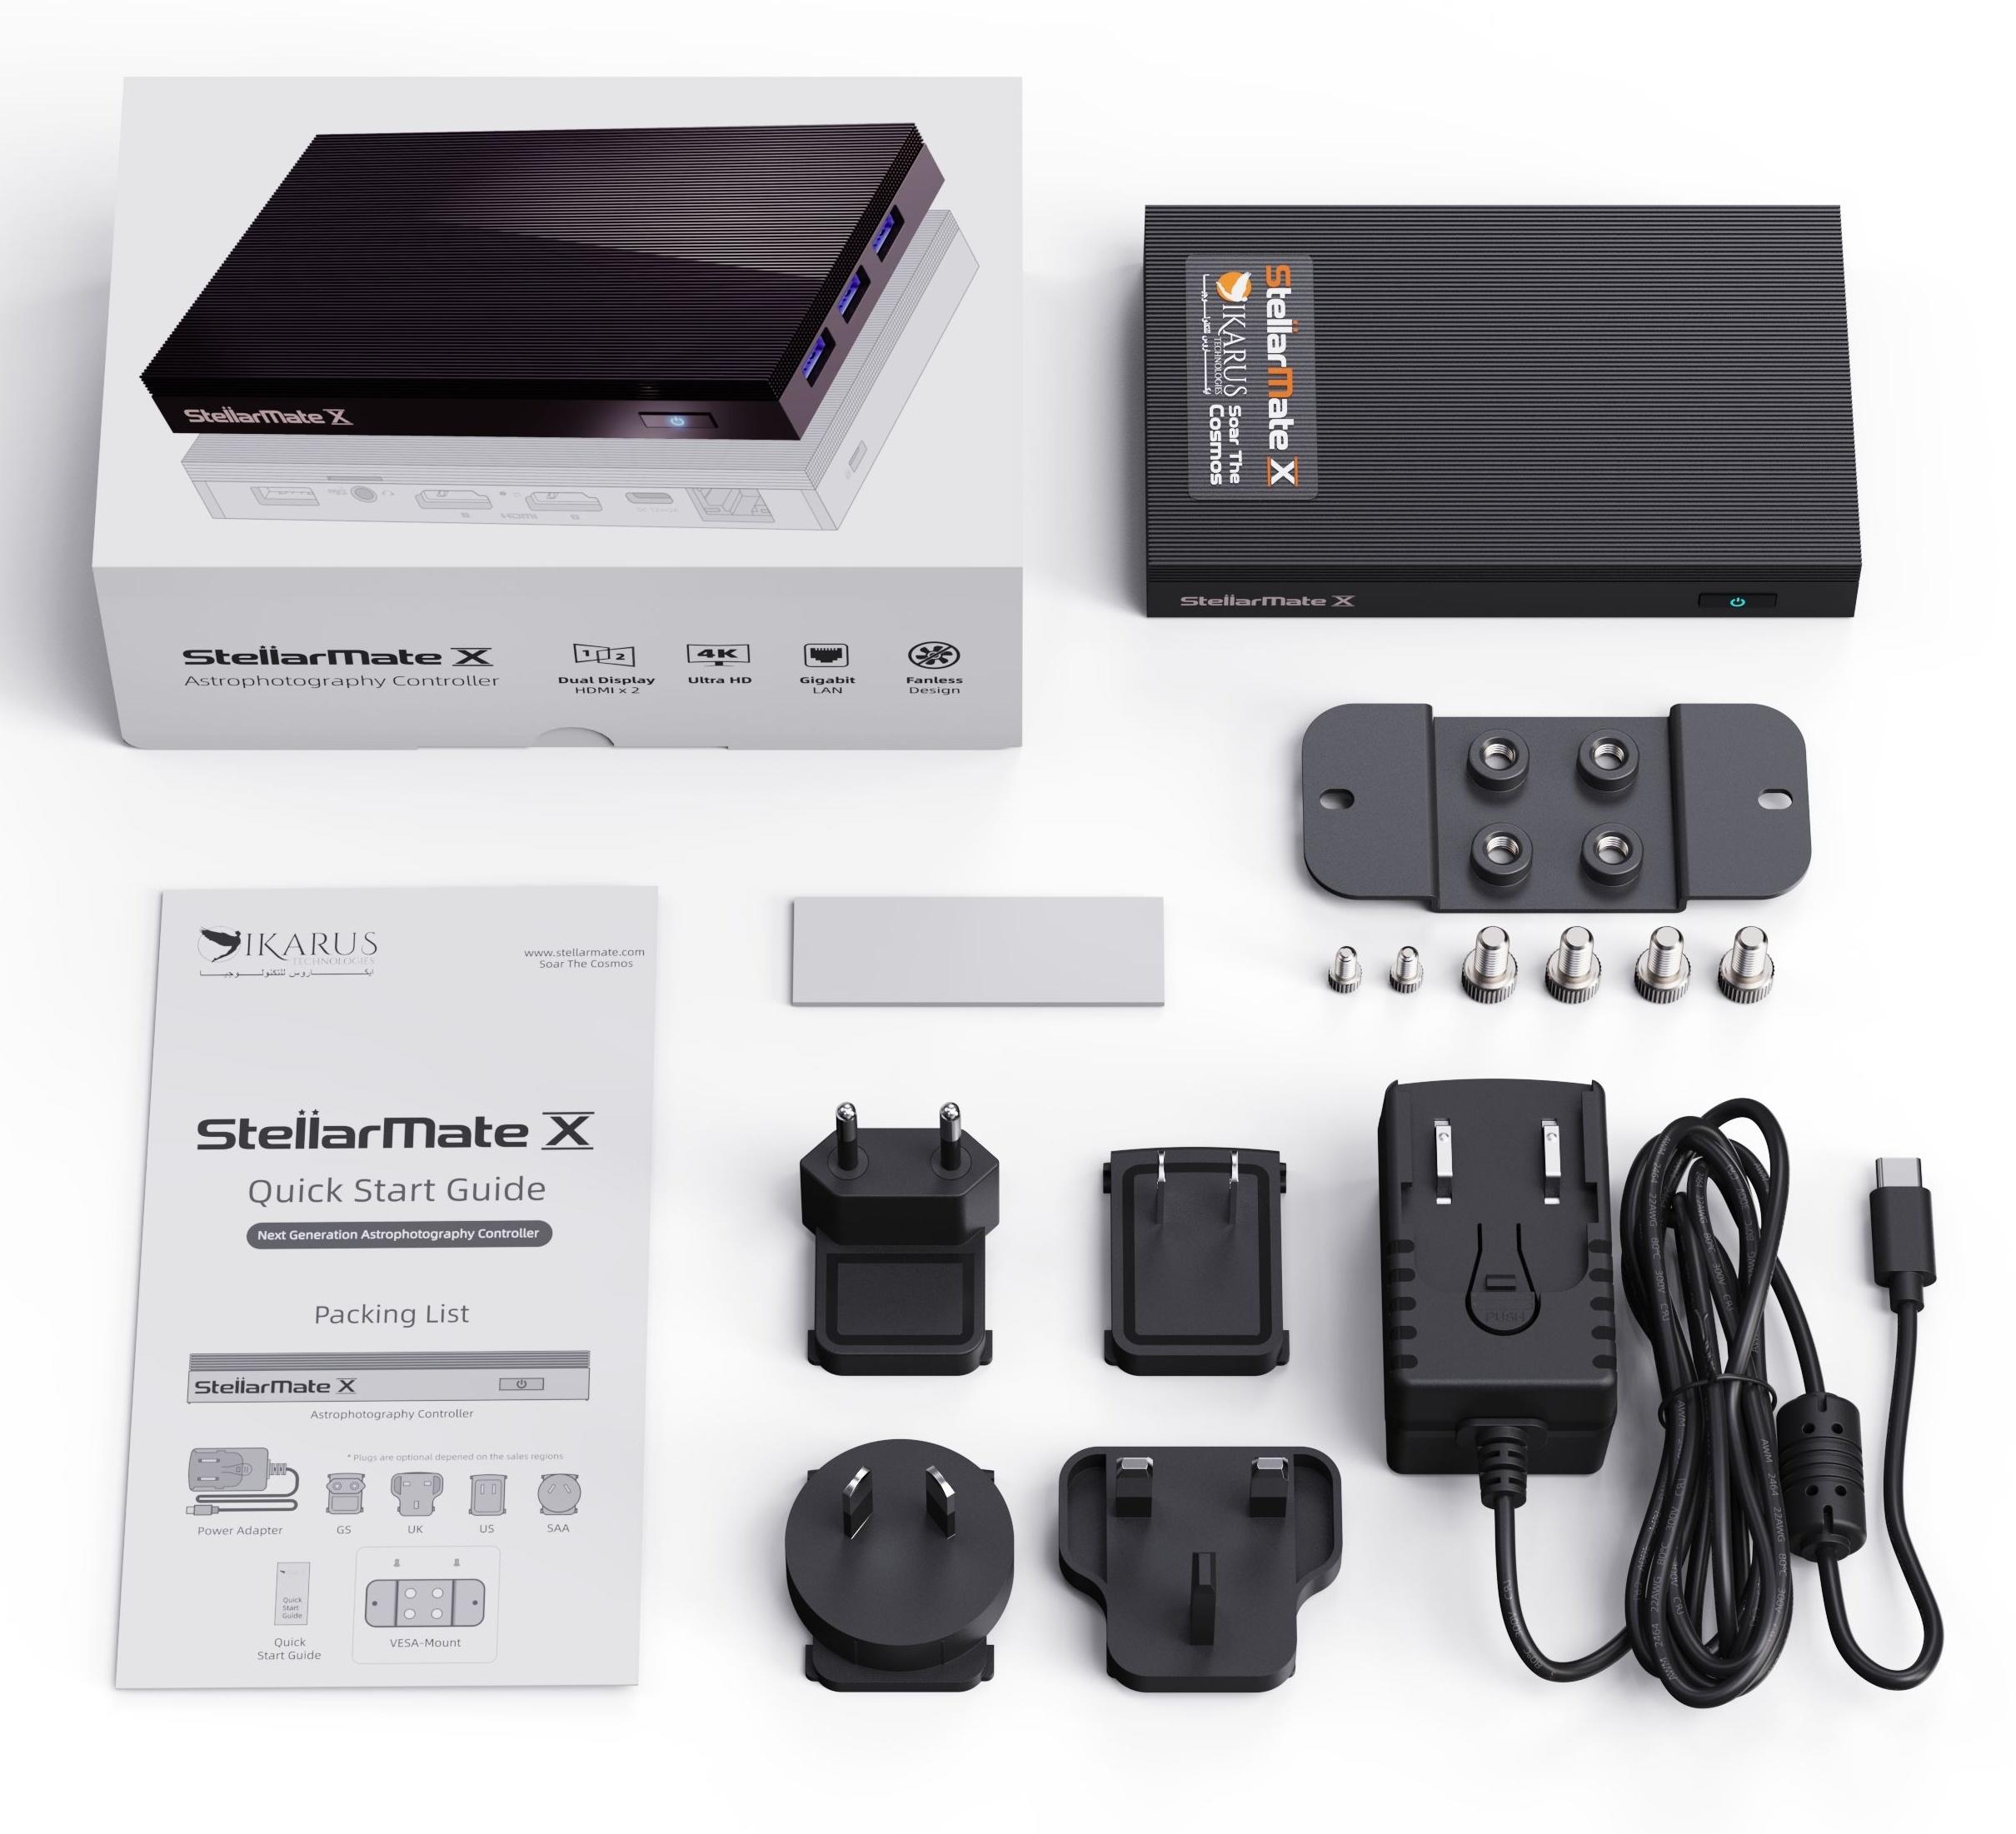
After unboxing your package, you should have the following items:
- StellarMate X Unit.
- USB-C Power Supply with international socket adapter
- Quick Start Guide.
- VESA-Mount
- Optional plug depending on the region.
Connect the USB-C power supply cable to StellarMate X and then turn power on. There is no need to push the power button as the unit automatically boots up when power is connected. A soft blue light indicates the unit is powered up. Startup time should take less than 30 seconds after which the unit is ready to be used.
2. Software
You can connect to StellarMate X Controller in several ways, including:
- StellarMate Mobile App for Tablets.
- PC/Mac using KStars.
- Any Web browser or VNC client.
2.1 StellarMate App
StellarMate App (SM App) is the Official App for StellarMate X Controller. It is available for both Android and iOS smart phones and tablets. It is primarily designed for tablets in landscape mode. While it can be used for phones, for the best experience, use it with a tablet/iPad. Download and install the App on your device before you continue.
![]()

The SM App is required to configure the unit for first time use. DO NOT skip this step.
3. Registration
The StellarMate Mobile App requires device registration through QR code in order to operate the StellarMate Controller. NO registration is required to use the StellarMate Controller if you intend to use it directly via Web or via Ekos client on Mac/PC/Linux. This step is only required if you want to use the StellarMate Mobile App. You can continue to use StellarMate as is, including accessing the Web Manager and VNC:
- Web Manager URL: http://stellarmate.local:8624
- Web VNC URL: http://stellarmate.local:6080/vnc.html
3.1. QR Code
If you received the StellarMate Controller, you will find the Device QR Code on the back of the unit.
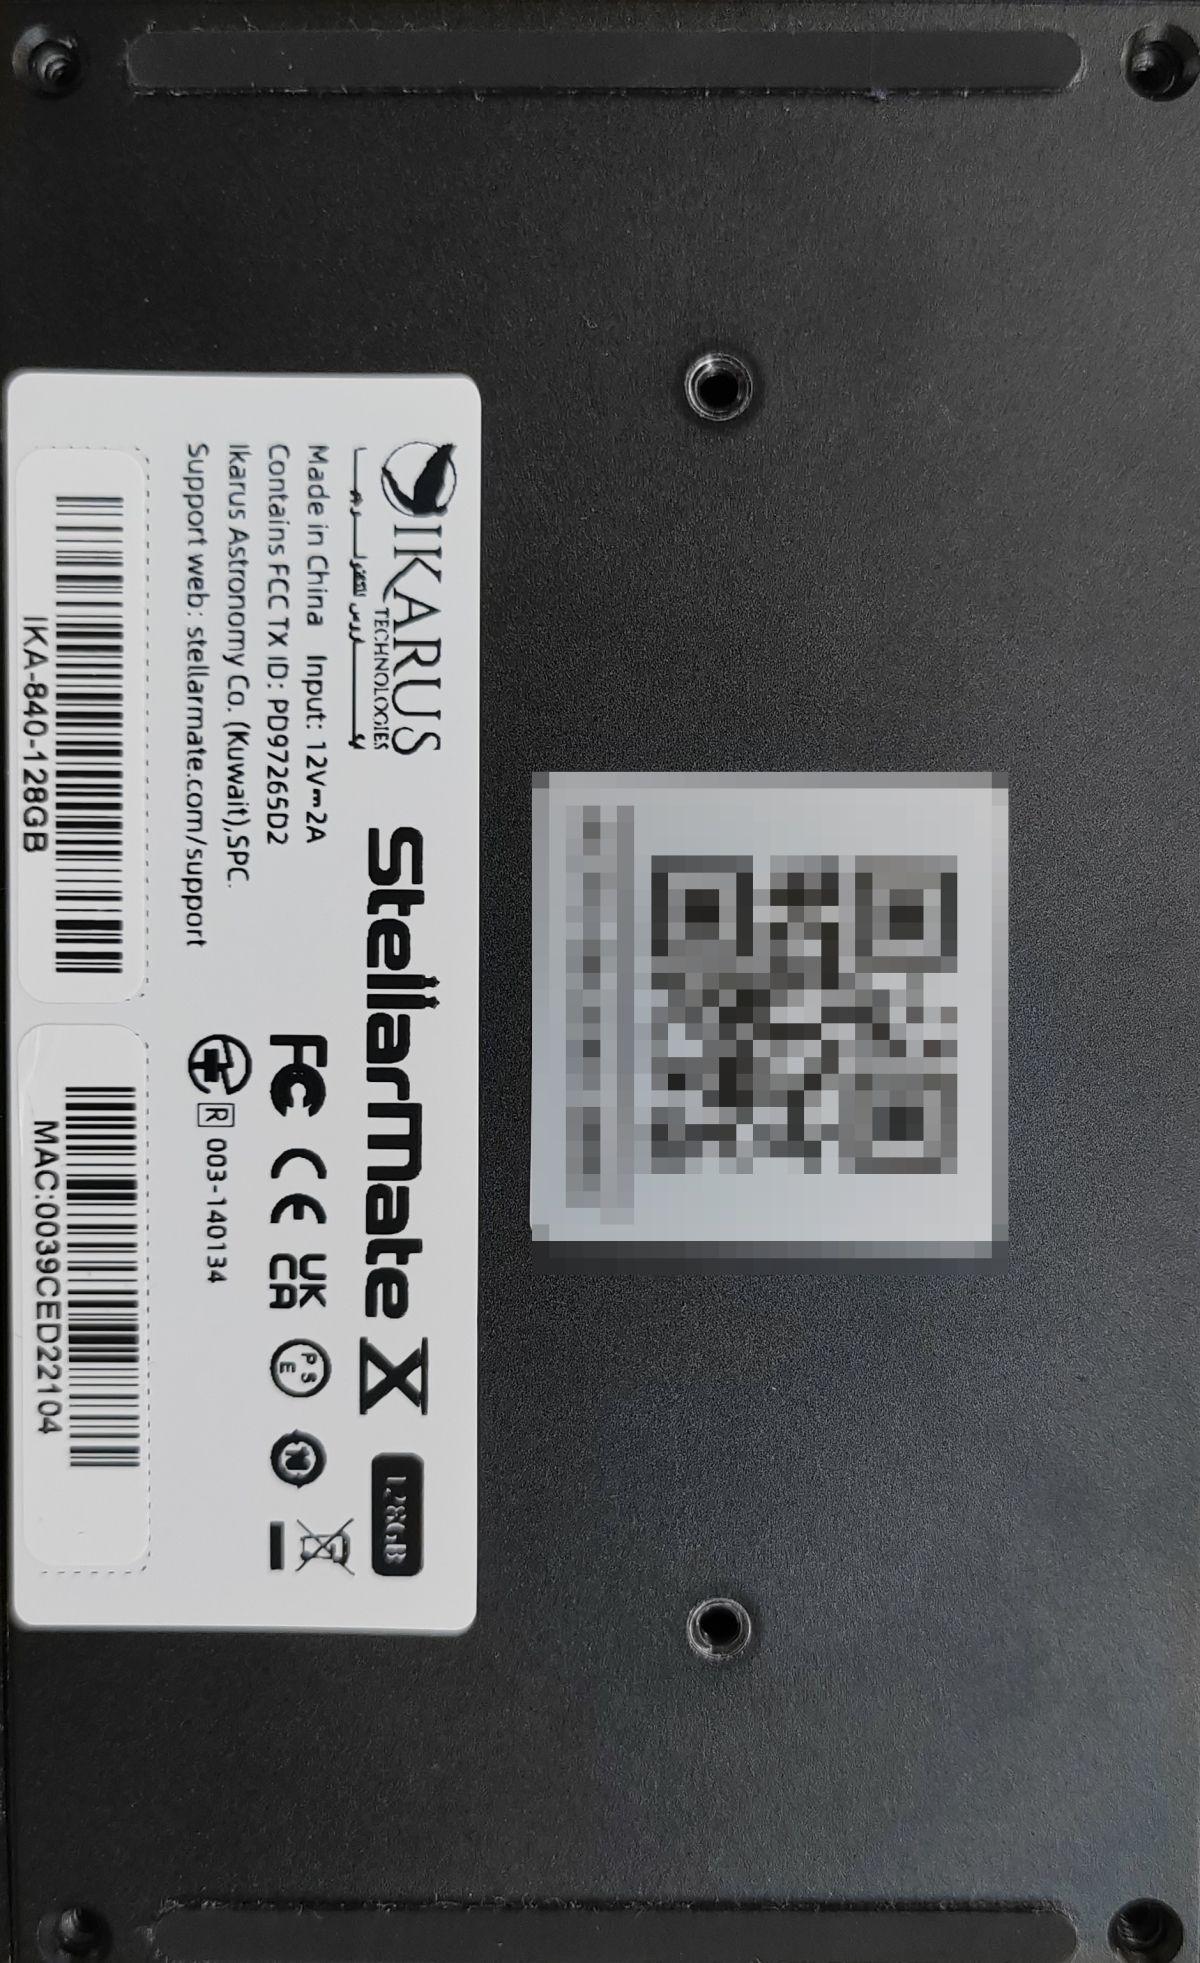
If you purchased StellarMate OS, the Device Serial Number is automatically generated for you.
3.2. Steps
Register your controller after downloading the SM App. Make sure your tablet is connected to the internet. Launch StellarMate App on iOS or Android.
StellarMate WiFi Hotspot operates at 5Ghz by default, not 2.4Ghz. Your phone or tablet must support 5Ghz WiFi.
3.2.1. First Time Registration
If this is your first time using the StellarMate App with StellarMate X Controller, tap on the Register button.

- Enter registration information to sign up in StellarMate website and then click Next.
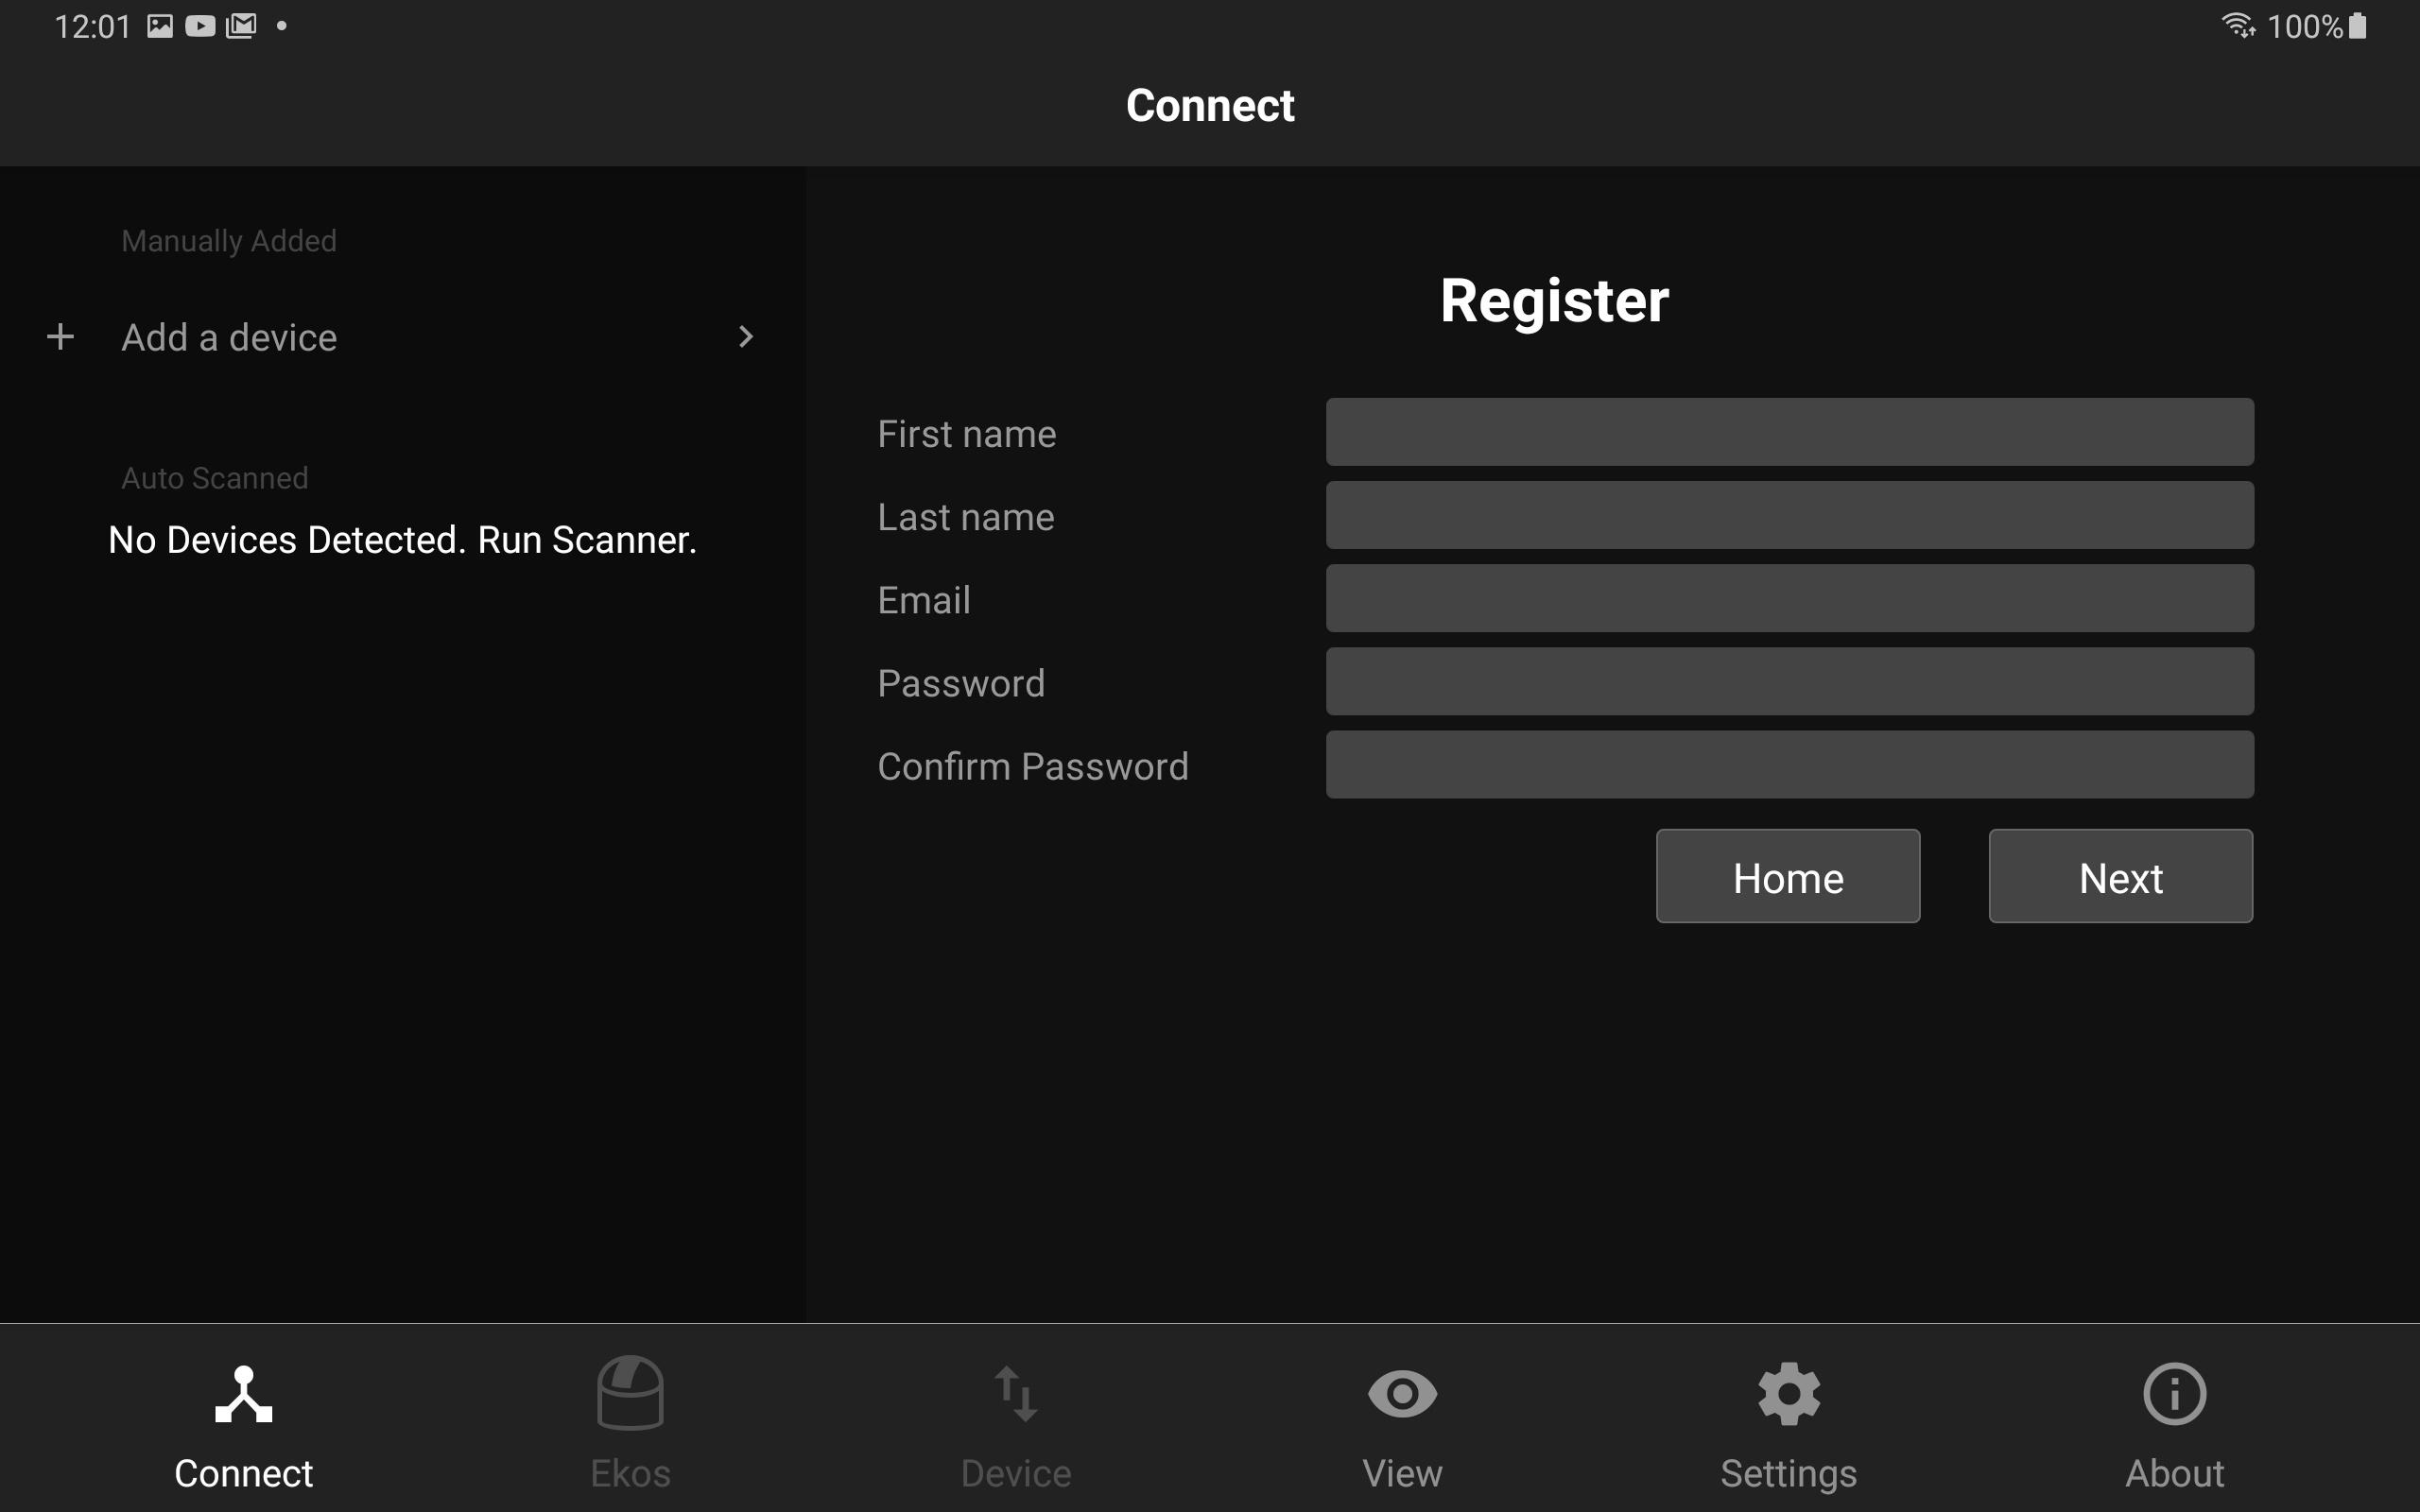
- Scan the QR Code found at the back of the unit.
- After registration is successful, you will be logged in automatically. Check your email for your license and login information. The username will be generated by the system and emailed to you.
3.2.2. Already registered or using StellarMate OS
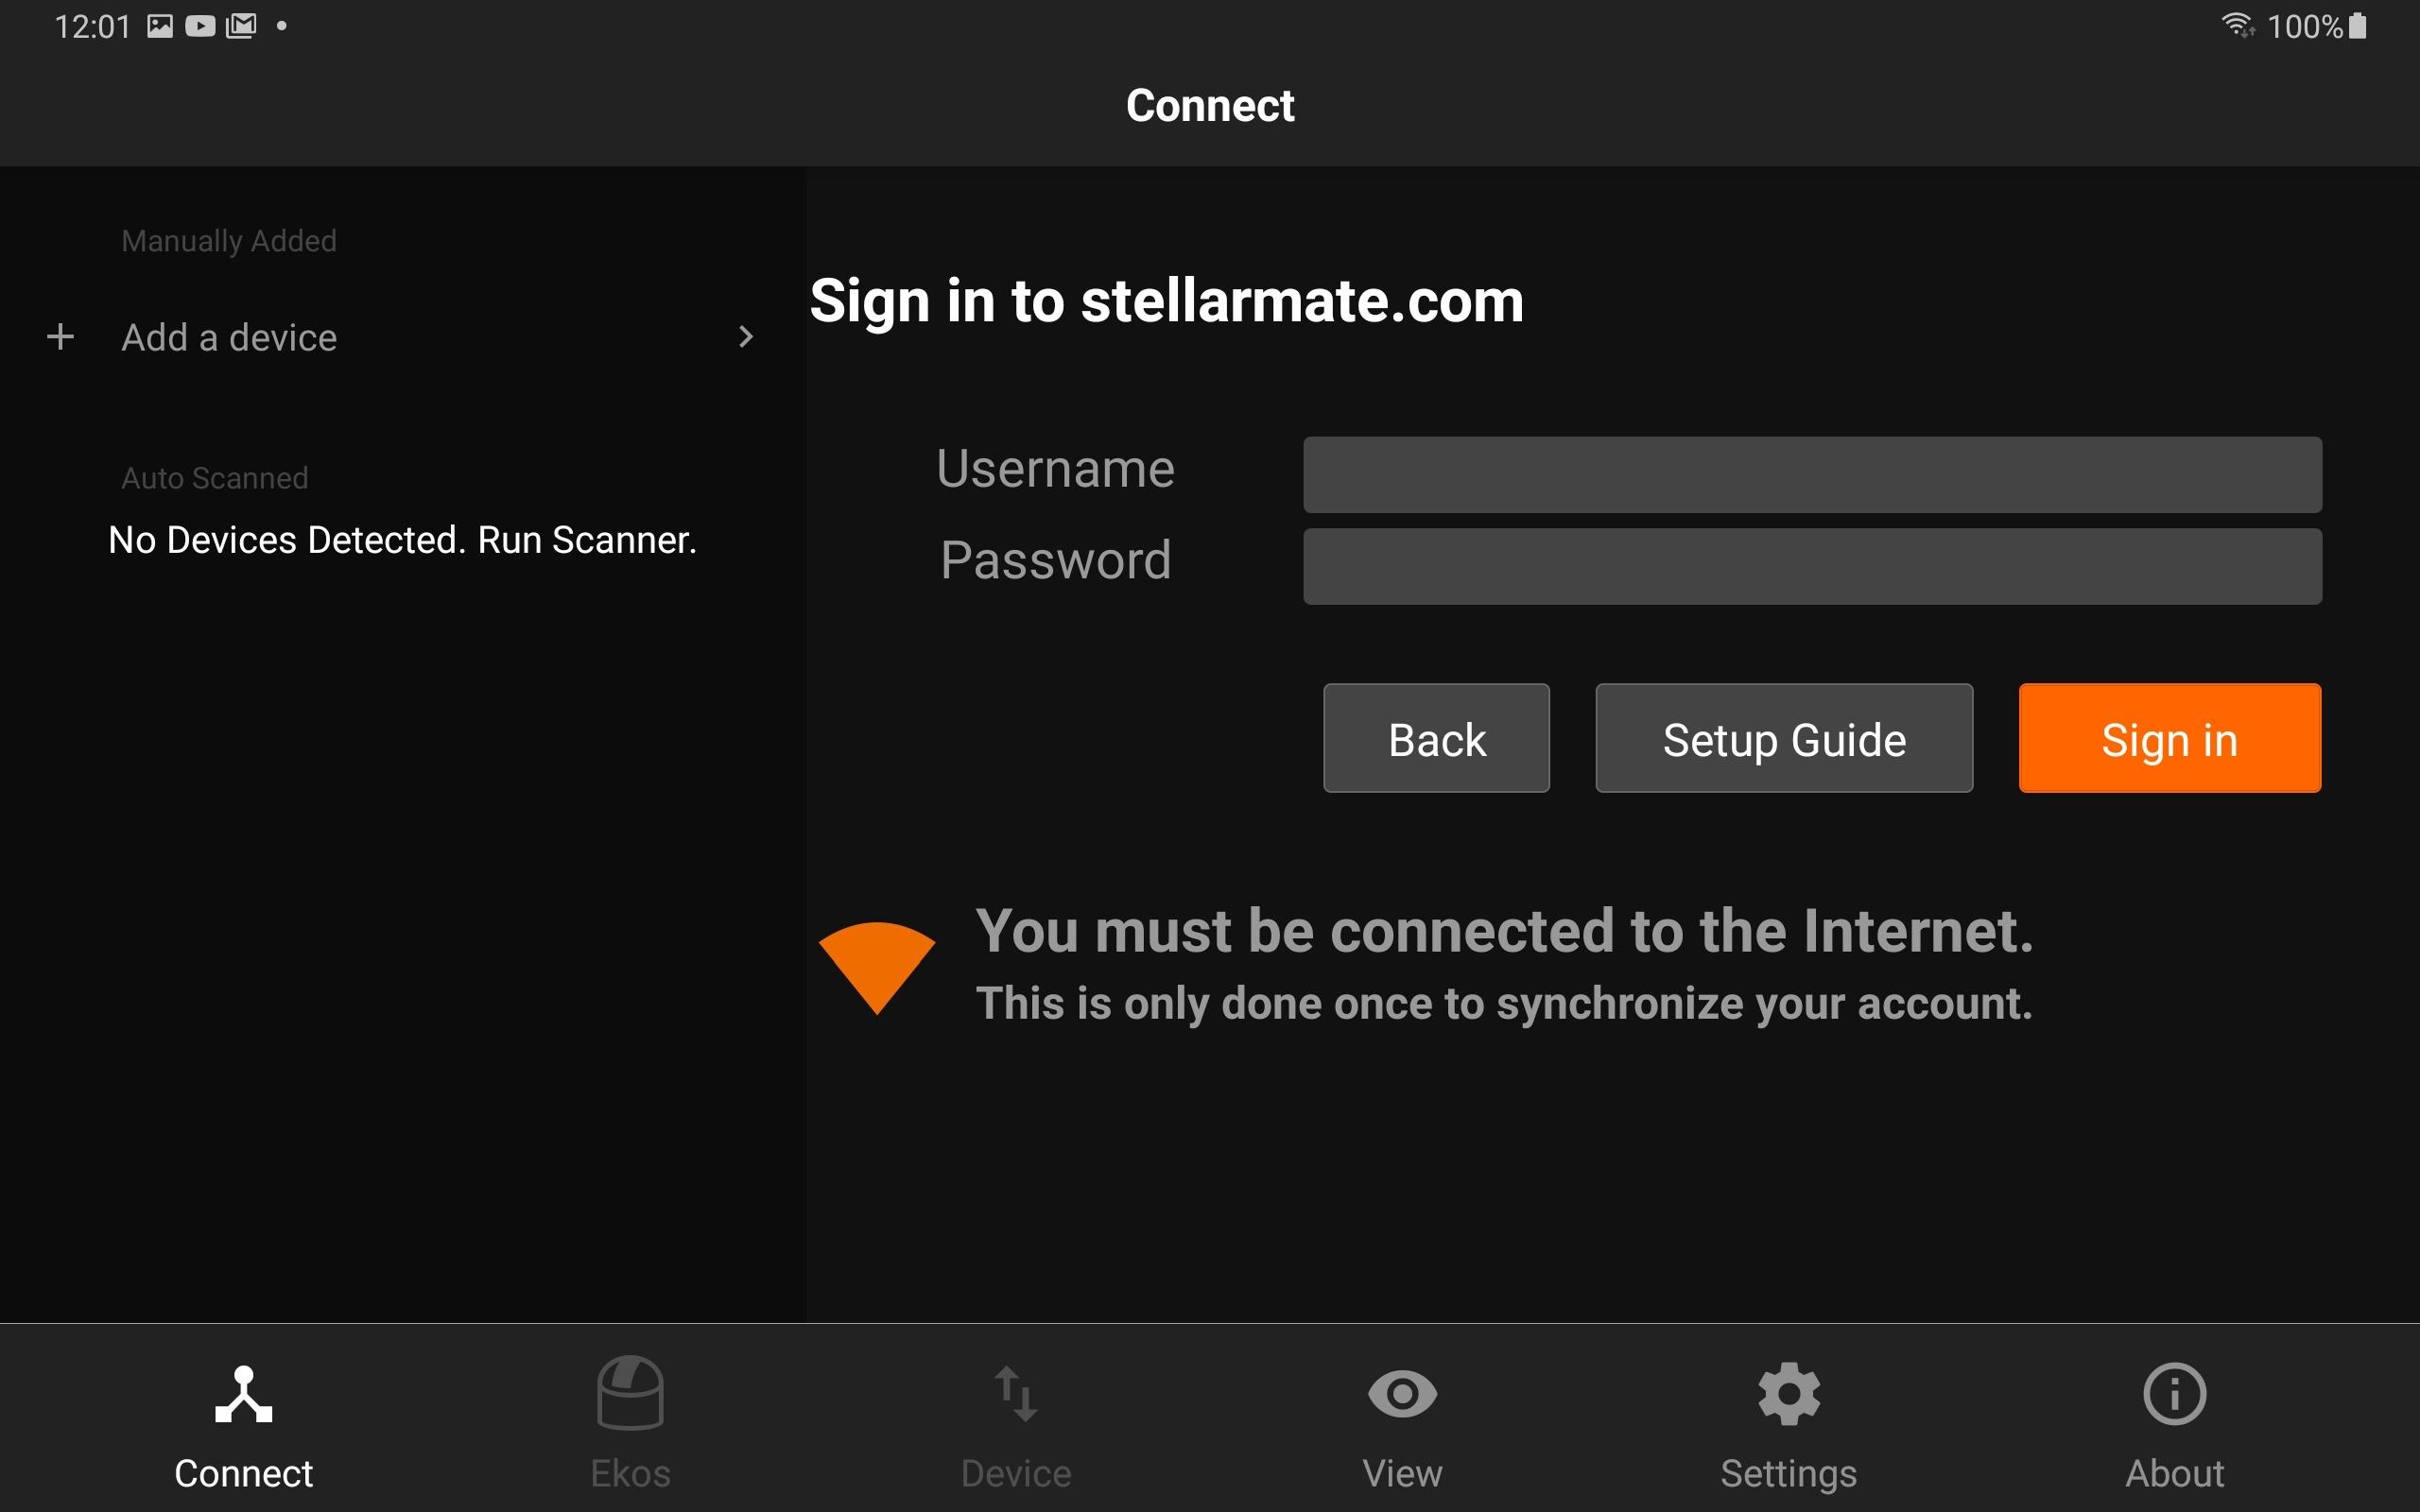
if you registered before, or your purchased StellarMate OS from the website, then tap on Sign In button. Enter the username & password, the same as when you login to stellarmate.com
4. Connecting to StellarMate
Depending on how you want to connect to StellarMate, click on any of the following options
4.1 StellarMate App
Go to your mobile OS WiFi settings and connect to the StellarMate hotspot.
Hotspot:  stellarmate
Password: stellar@mate

On some Android/iOS devices, you might be asked to Sign In to the device. No Such sign in is required, if you are prompted for sign in, tap on the menu icon and select Keep Network As is.

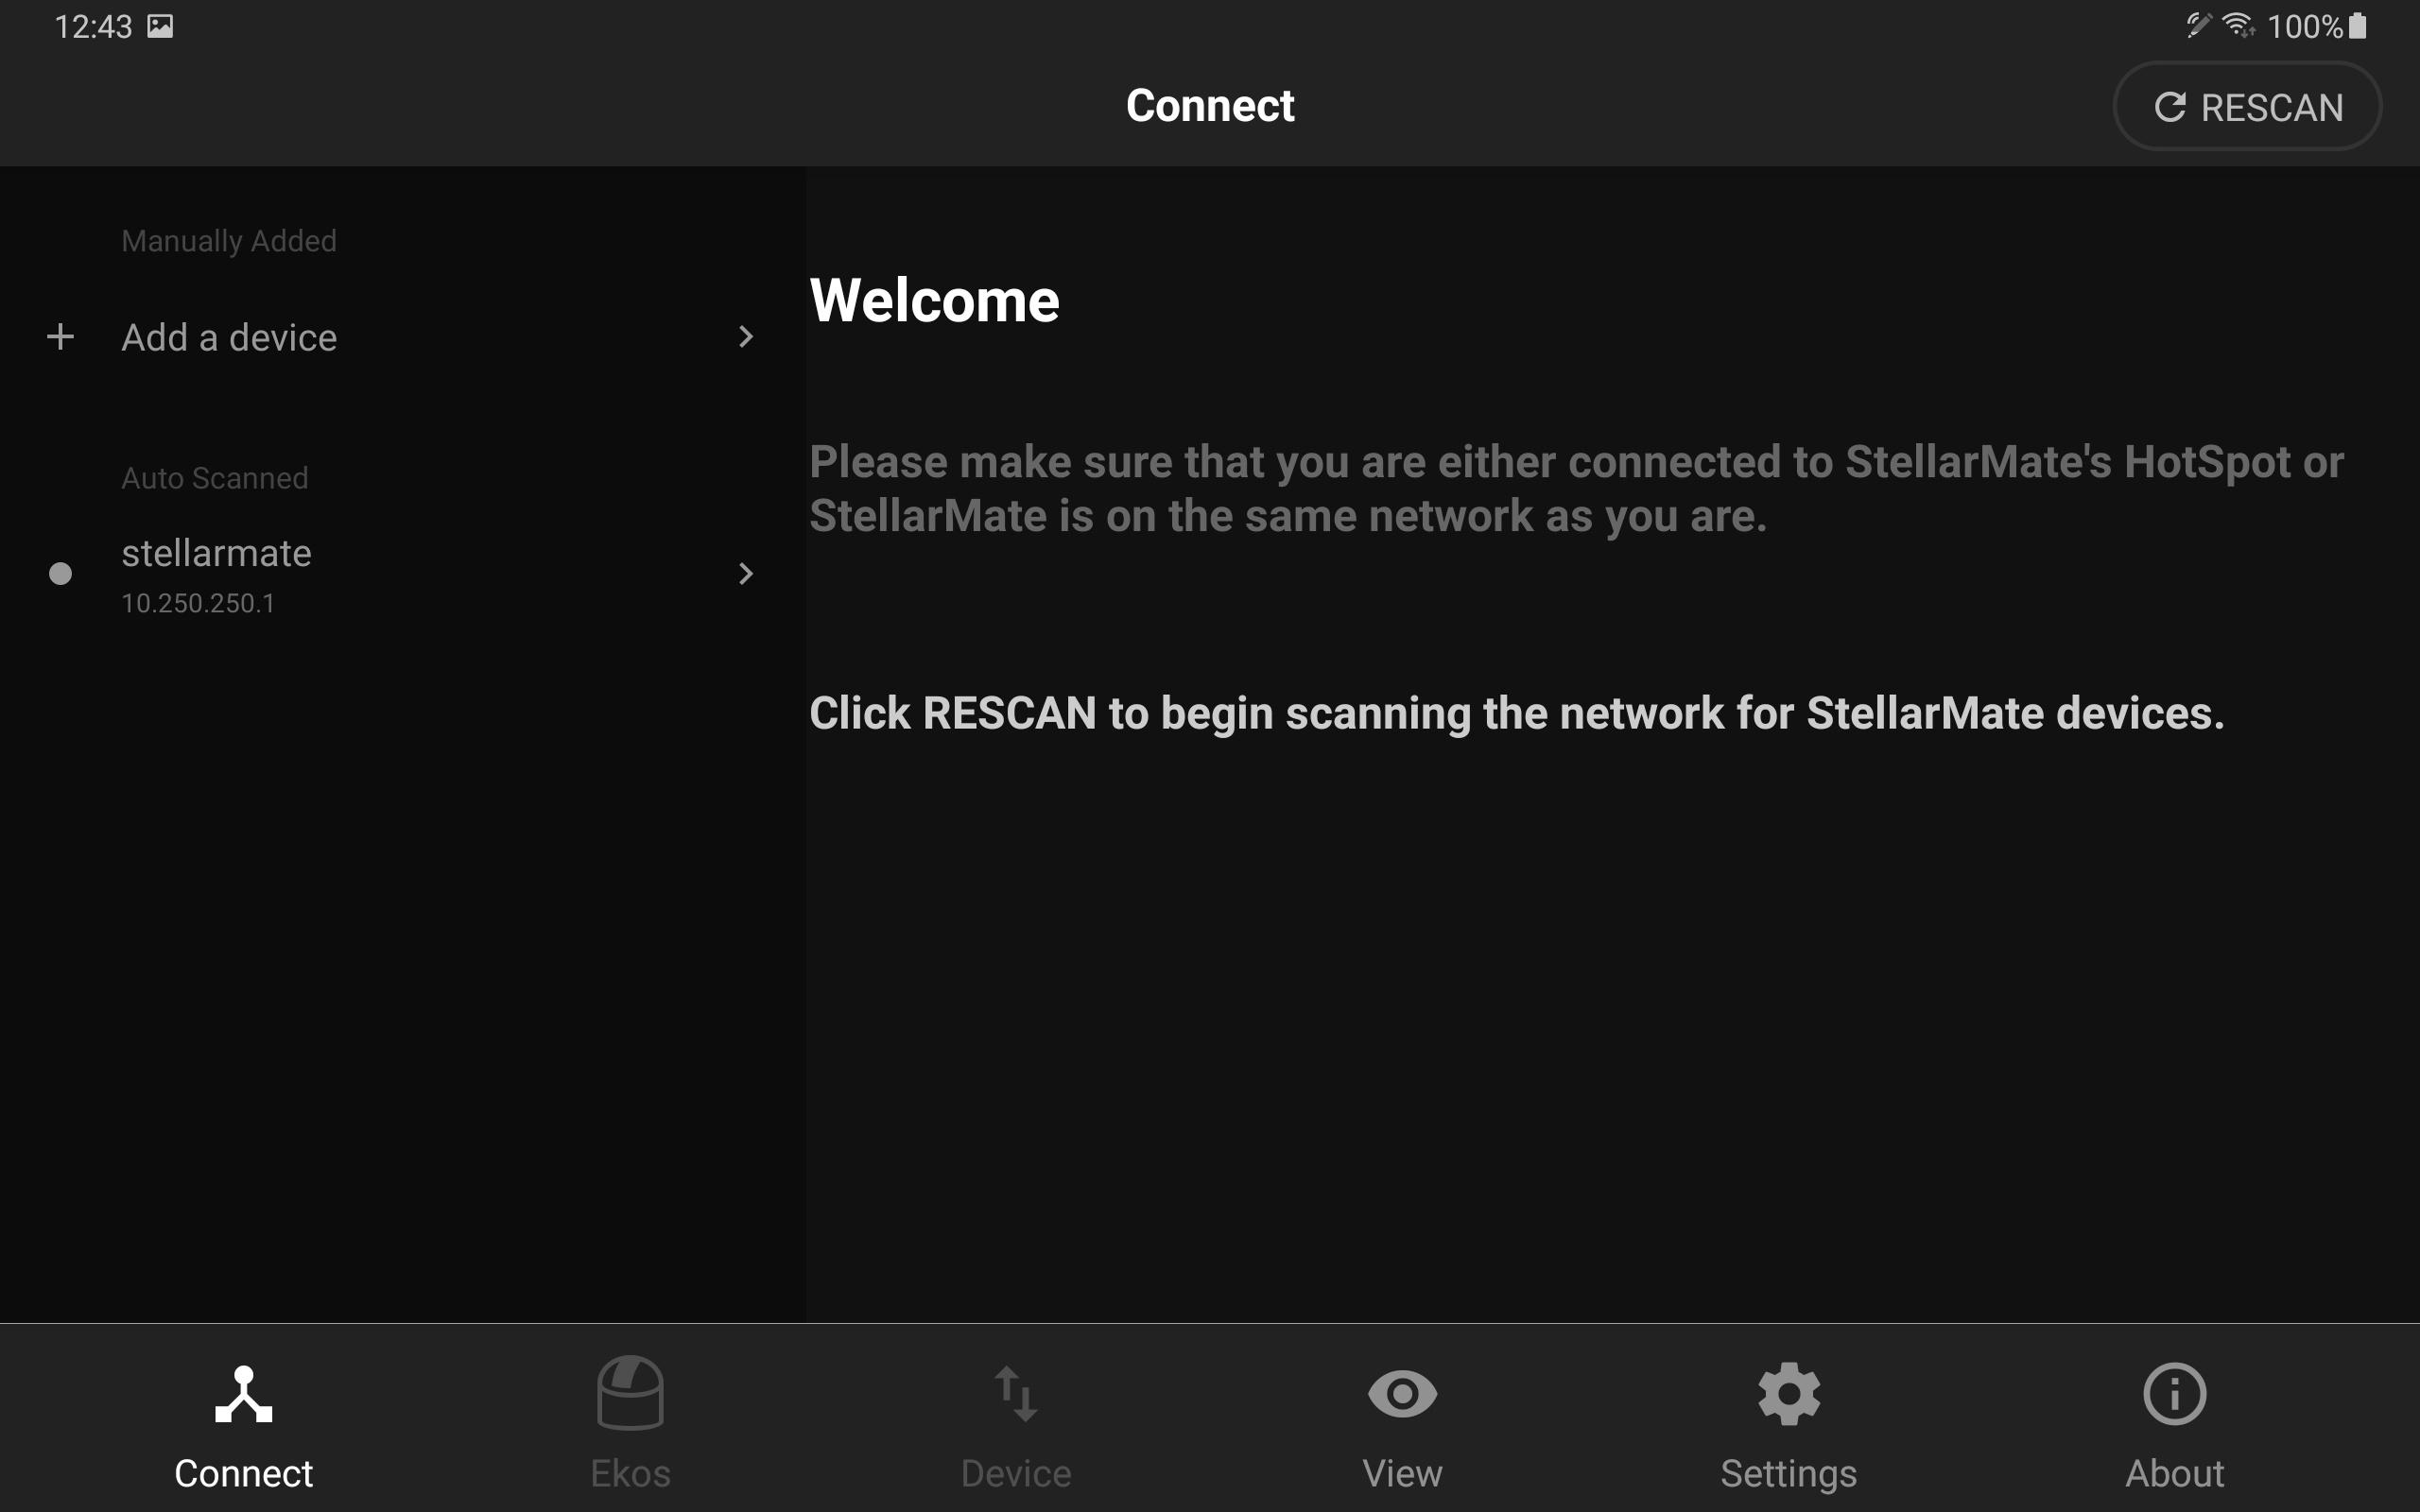
After connecting to StellarMate HotSpot, go back to the StellarMate App:
- Tap on RESCAN to start the scanning process.
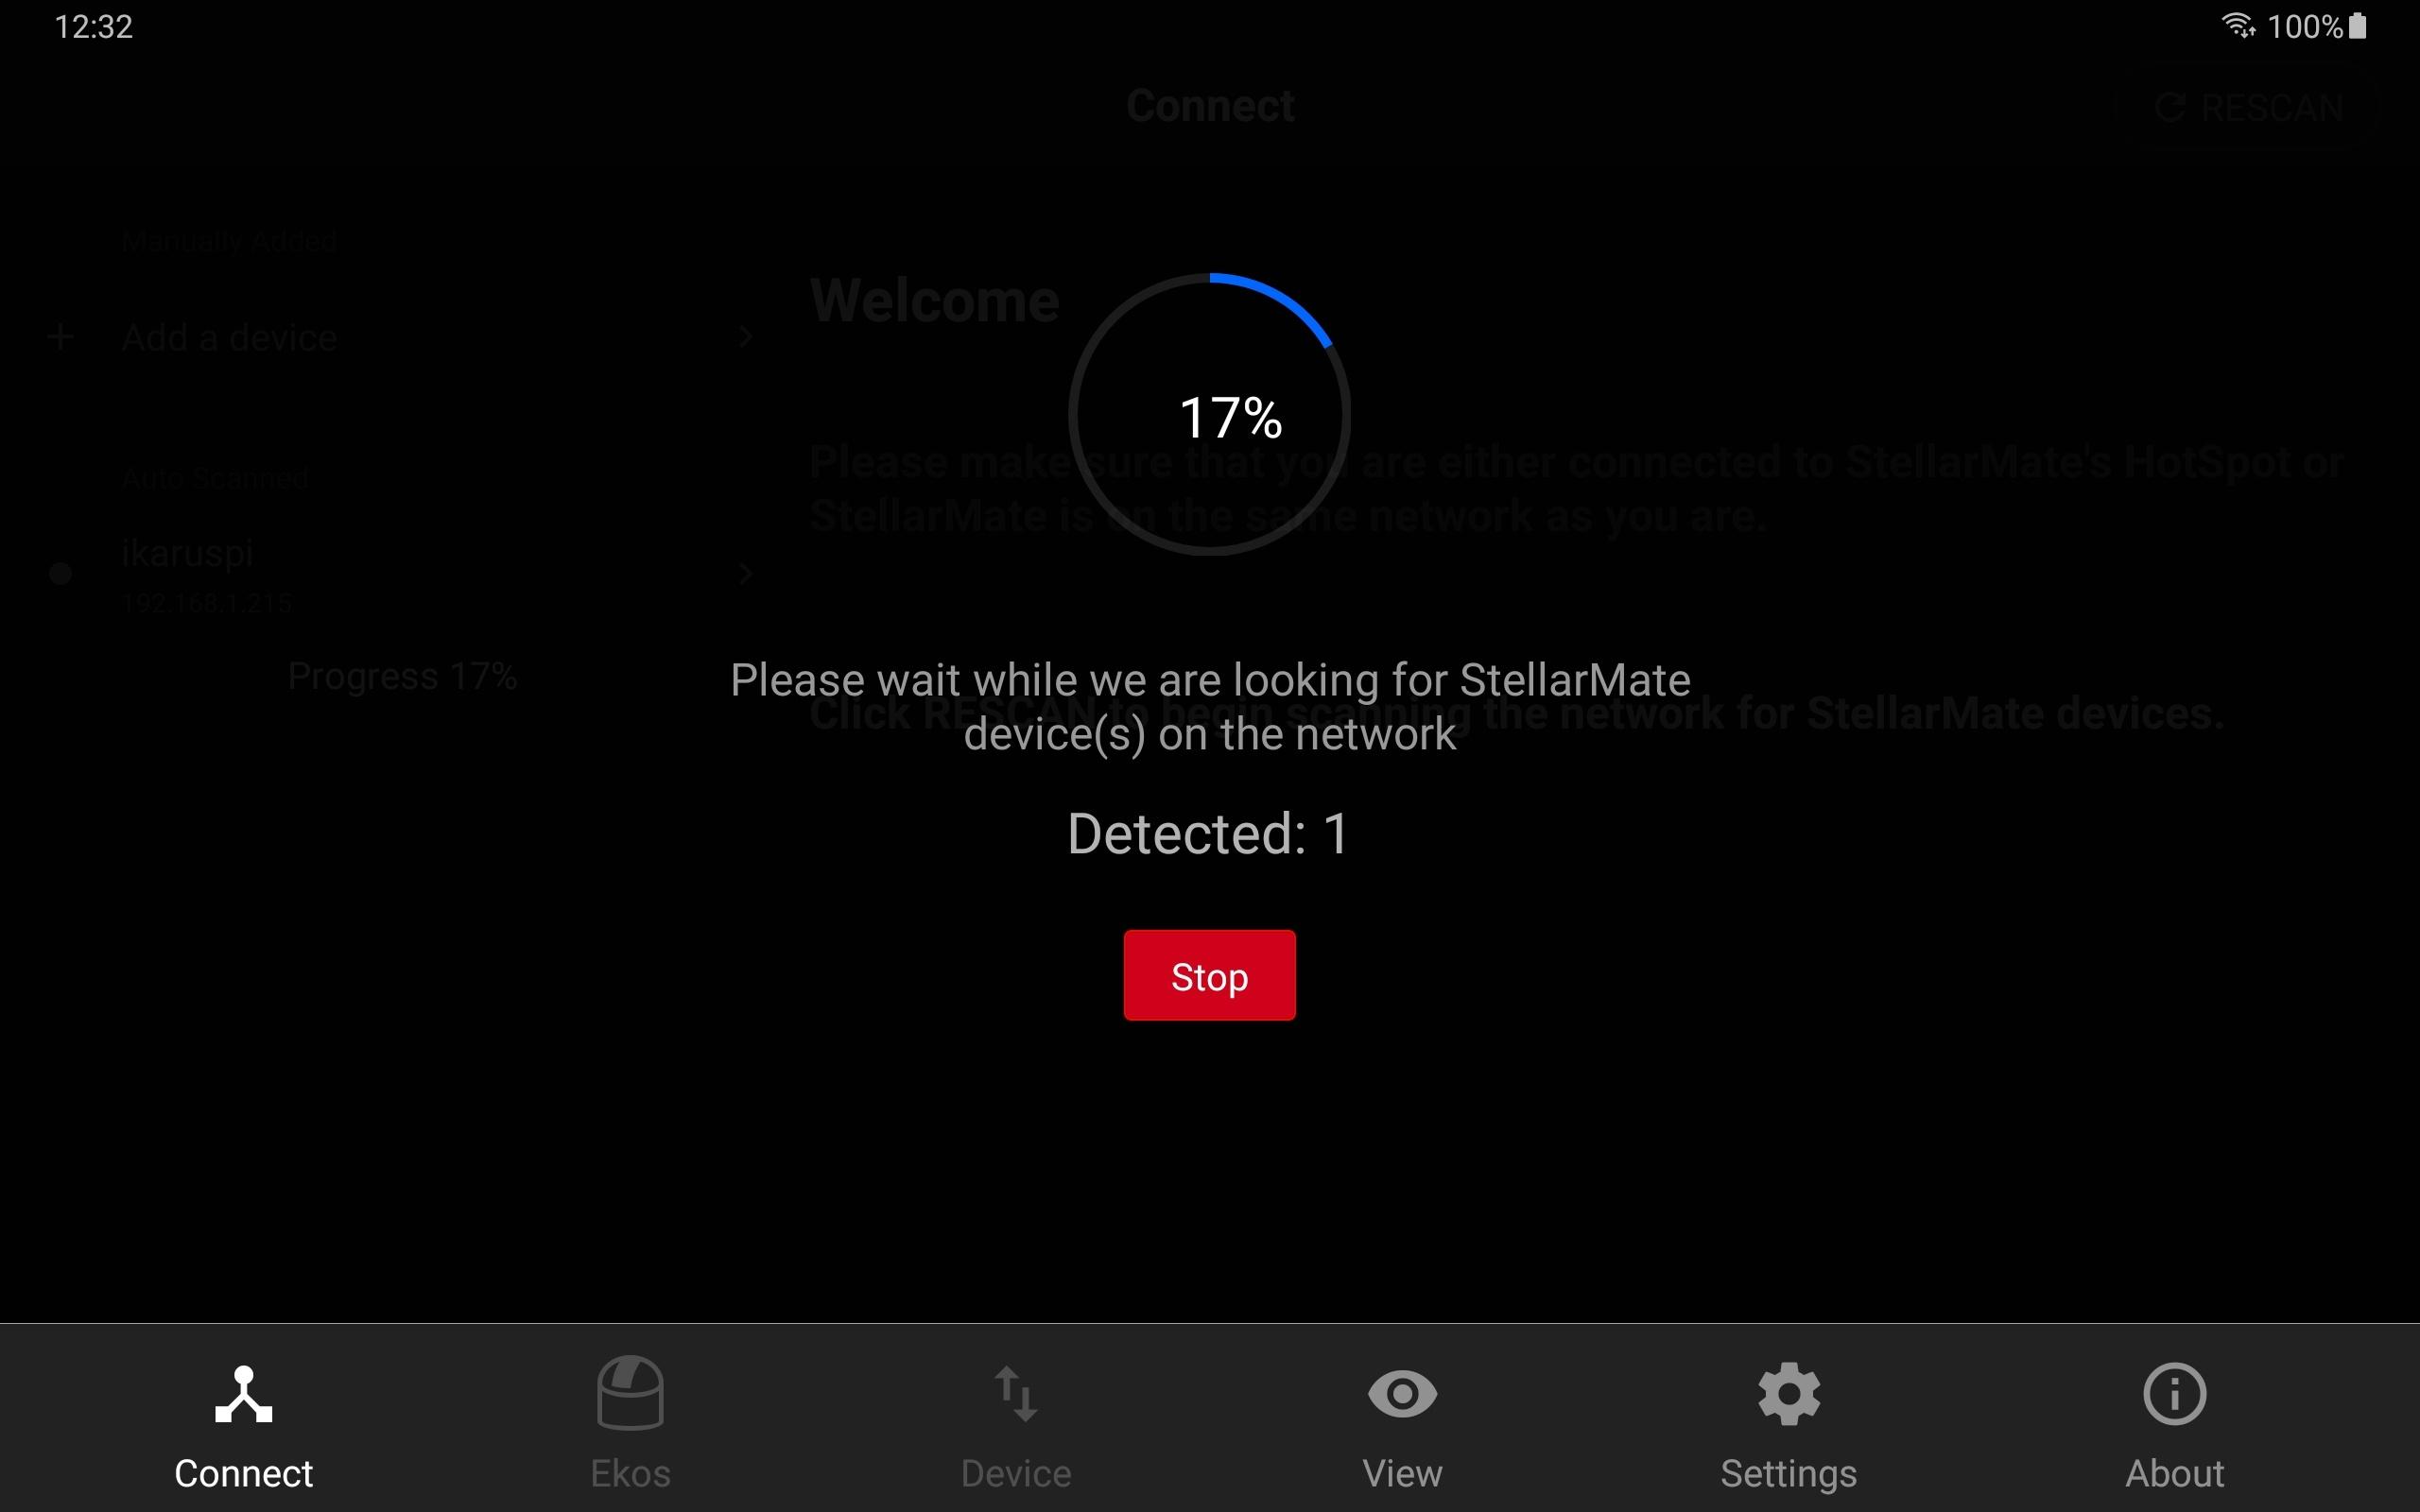
- After a few seconds, StellarMate X Controller should be detected and displayed in the Auto Scanned pane on the left. Tap on the stellarmate device to establish connection to it.
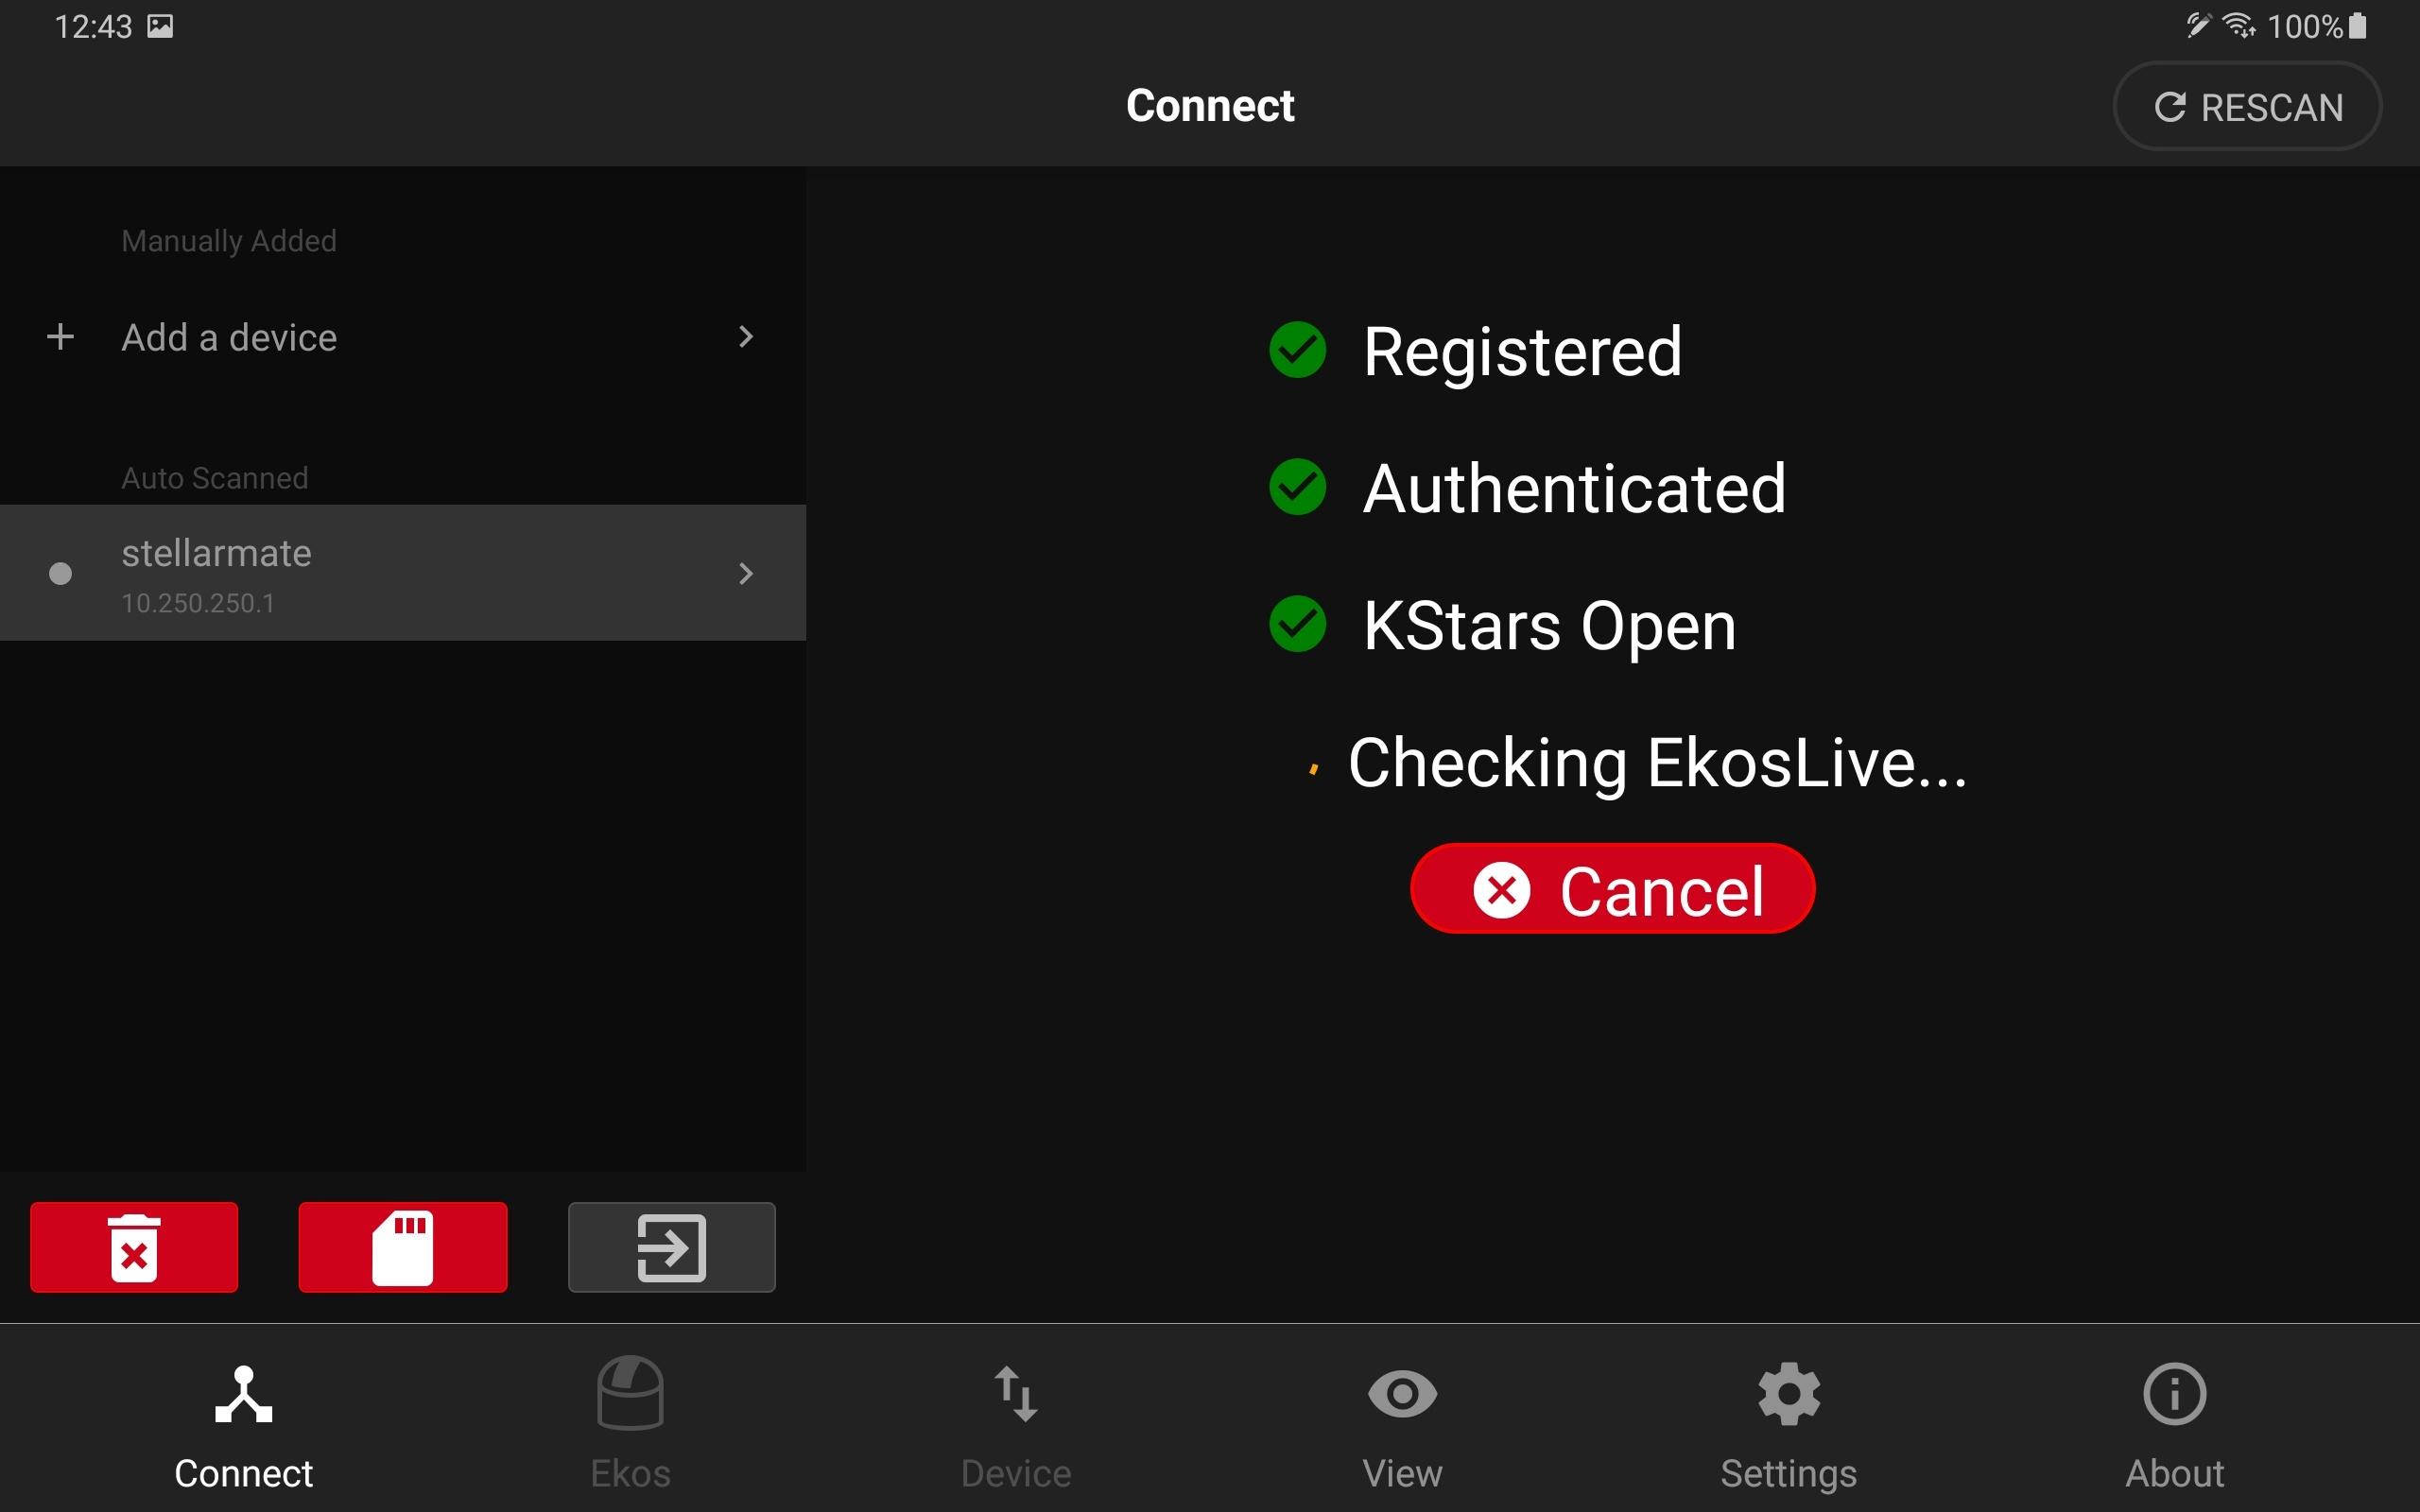
- The App will establish connection to StellarMate X Controller. After a successful connection, the LED next to stellarmate should turn green.
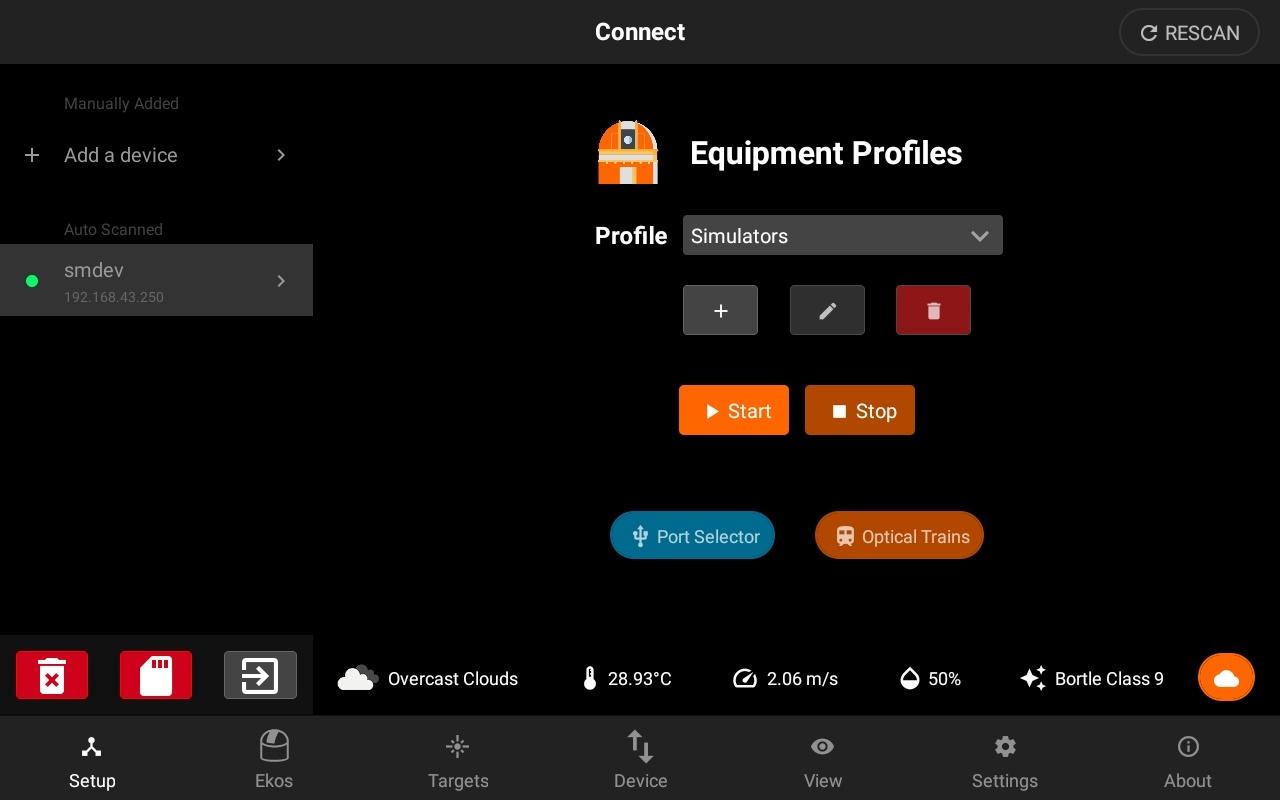
- The right side pane should now display the Equipment Profile page. Congratulations! Now you are ready to connect to your astronomical equipment.
Besides the StellarMate App, you can also access StellarMate through VNC, you have to first connect to the WiFi Hotspot and then open your favorite browser and you can either:
- Go to stellarmate.local:6080/vnc.html directly, click Connect and then use smate as the password.
- Go to stellarmate.local, and then click on the button on the bottom-right corner, then select Desktop, you should be redirected to the VNC portal, click Connect and then use smate as the password.
5. Connecting your devices using StellarMate App
Most astronomical equipment such as telescopes, cameras, filter wheels, and focusers connect via a USB cable. To add your devices, you need to create a new Equipment Profile. Tap on the Add (+) icon next to the profiles to start the equipment profile wizard.
Select the driver appropiate for your device. If you do not know which driver to select for your gear, check out the INDI Devices portal for more information.
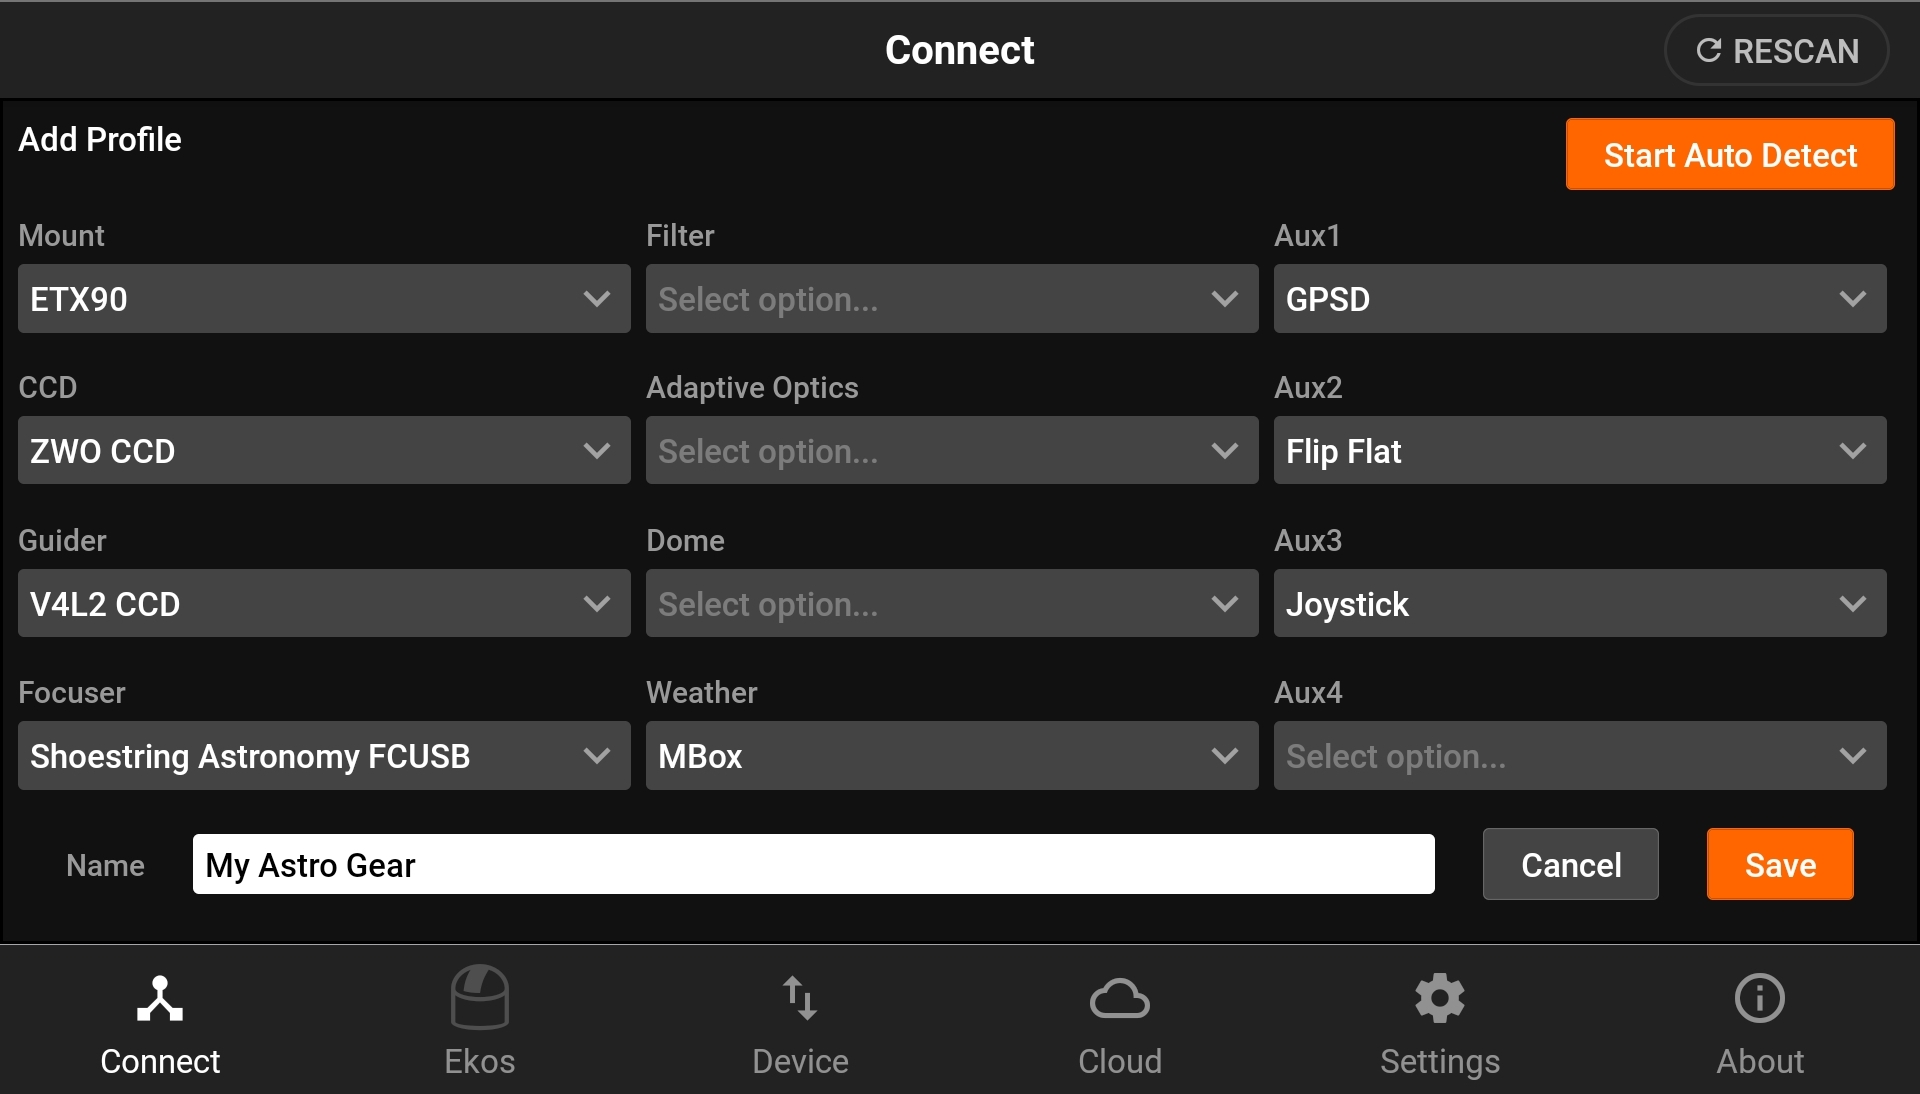
After all drivers are selected, enter the desired profile name and tap Save.
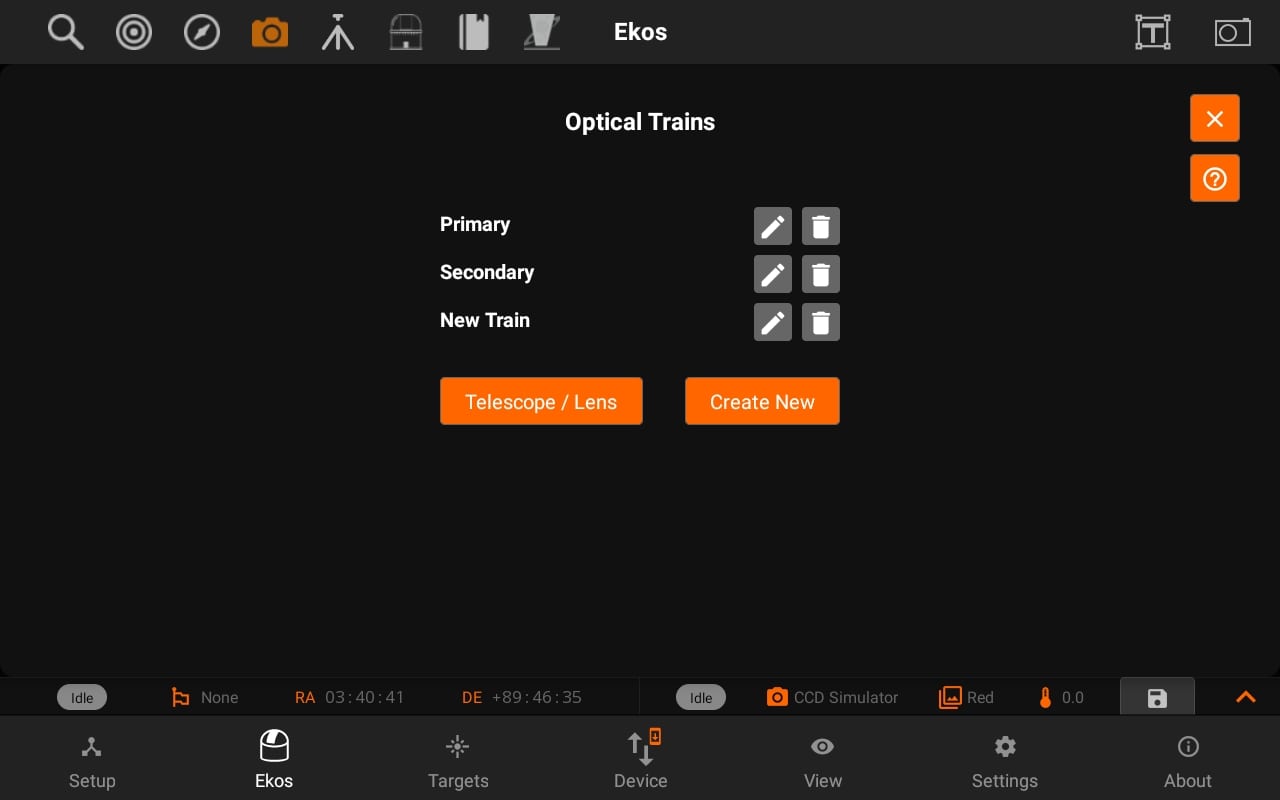
5.1. Optical Trains
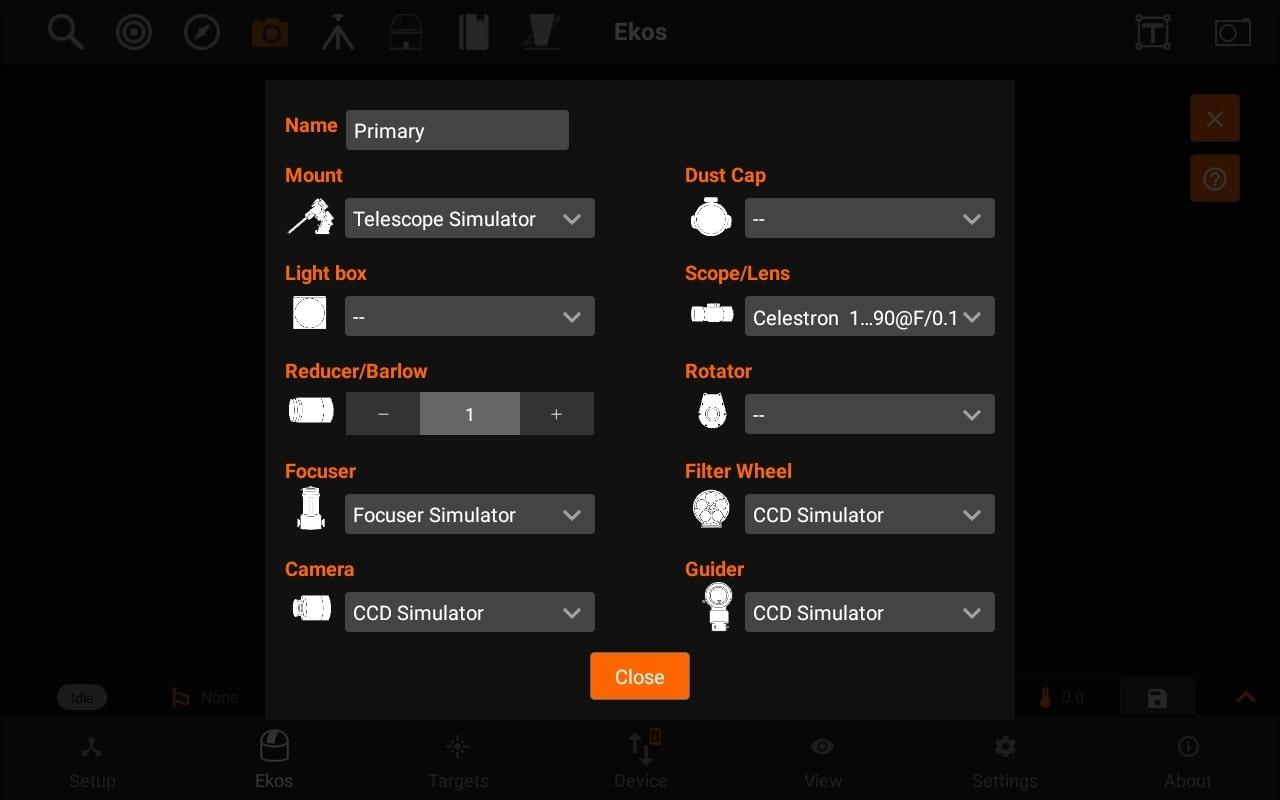
Optical Trains organize your equipment into separate unique optical paths. Each camera must have its own optical train. The following elements are specified in each train:
- Mount: Select which mount to use. Typically, all optical trains in the same profile use the same mount.
- Dust Cap: Select a mechanized dust cap if any (e.g. FlipFlat).
- LightBox: Select a flat field lightbox if any (e.g. FlipFlat).
- Scope or DSLR Lens: Select the scope or lens used in the optical path. To add, edit, or delete optical elements, tap the Telescope & Lens button.
- Reducer / Barlow: Select if any reducer or barlow is used in the train.
- Reducer: By default it is specified at 1.0 which means that has no effect. Range is 0.1x to 0.9x.
- Barlow: If the value specified is over 1.0x, then it is considered a barlow element (focal length is increased by this factor).
- Rotator: Select a mechanized rotator if any.
- Focuser: Select a mechanized focuser if any. A manual focuser driver is also available where are asked to confirm each filter manually.
- Filter Wheel: Select a filter wheel. This must be a standalone filter wheel connected to StellarMate via USB. If you have a filter wheel that is embedded in a camera, leave this field empty.
- Camera: Select imaging camera for this train. Each camera must have its own train.
- Guider: Select the device that receives the guiding correction pulses. This can be one of the following devices:
- Mount: If the Mount can receive guiding correction pulses, then it is best to select it so that the pulses are directly sent to the mount. This is the recommended option.
- ST4: If using an ST4 cable between the guide camera and mount, then you should select the Guide Camera as the Guider.
- Dedicated Guider: If using a dedicated guider interface device (like Shoestring GPUSB) then select it as the Guider.
If a device provides more than one functionality, then it should be specified in all relative fields. For example, MoonLite Nightcrawler is a Rotator and Focuser at the same time, so we select NightCrawler under both Rotator and Focuser fields.
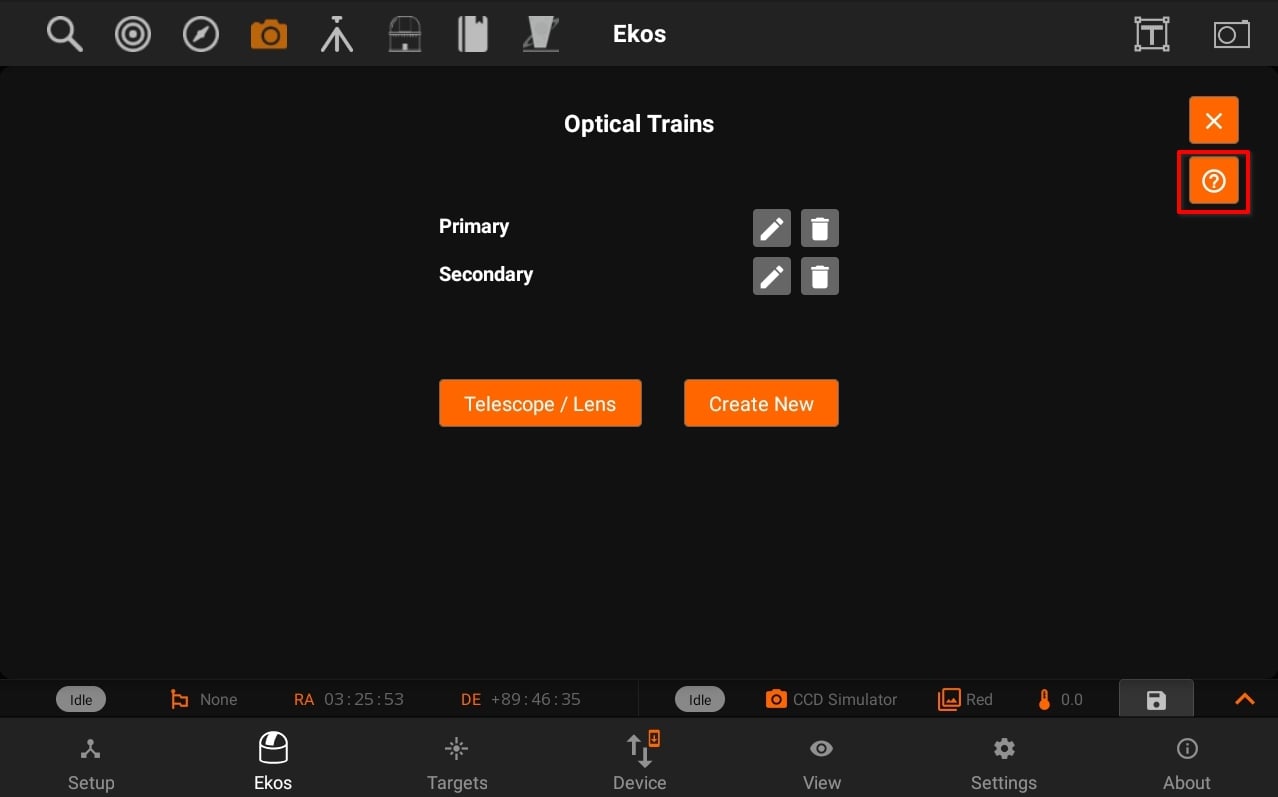
Once the optical trains are configured, specify which trains to use in each Ekos module. Typically, the Primary optical train is used in Capture, Focus, and Align modules while the Secondary train is used in Guide.
Tap the help Button to view an external video tutorial on Optical Train.
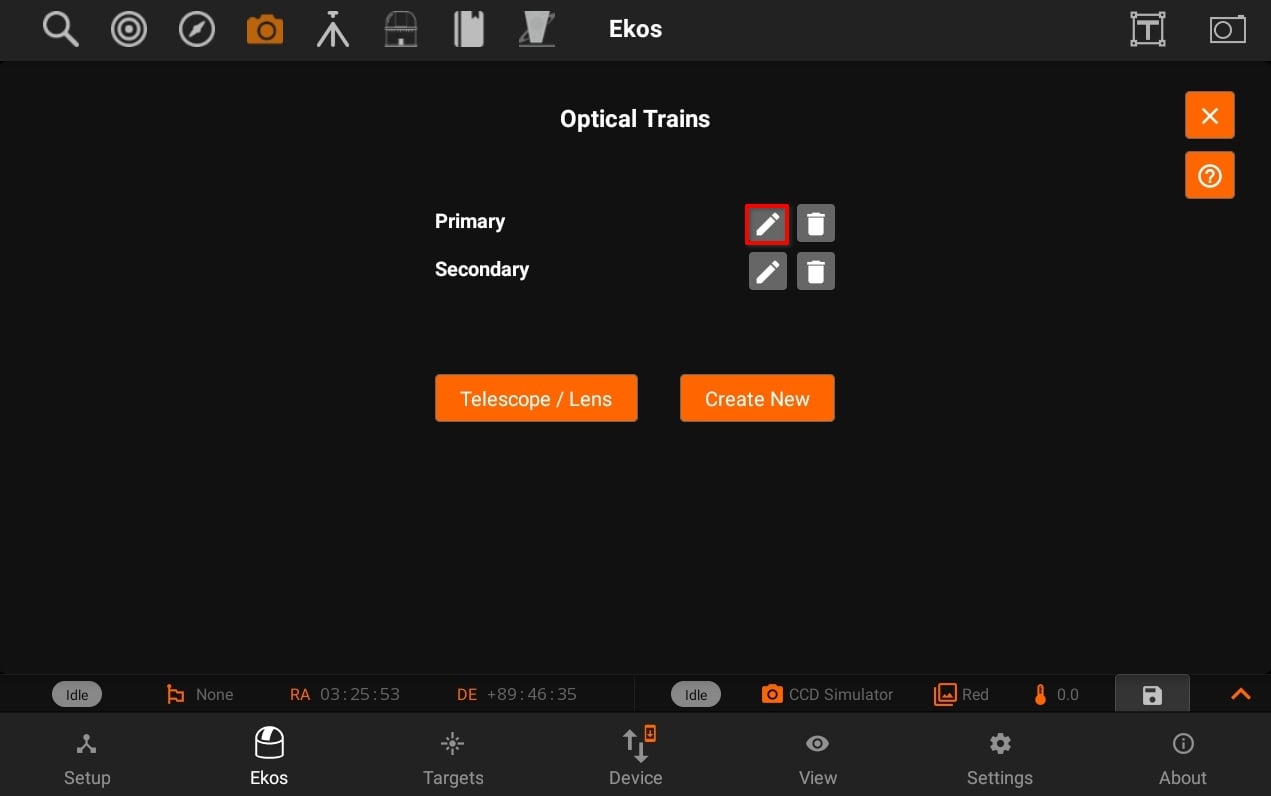
Tap the edit button and it will open the Optical train modal with the specific settings of a trian.
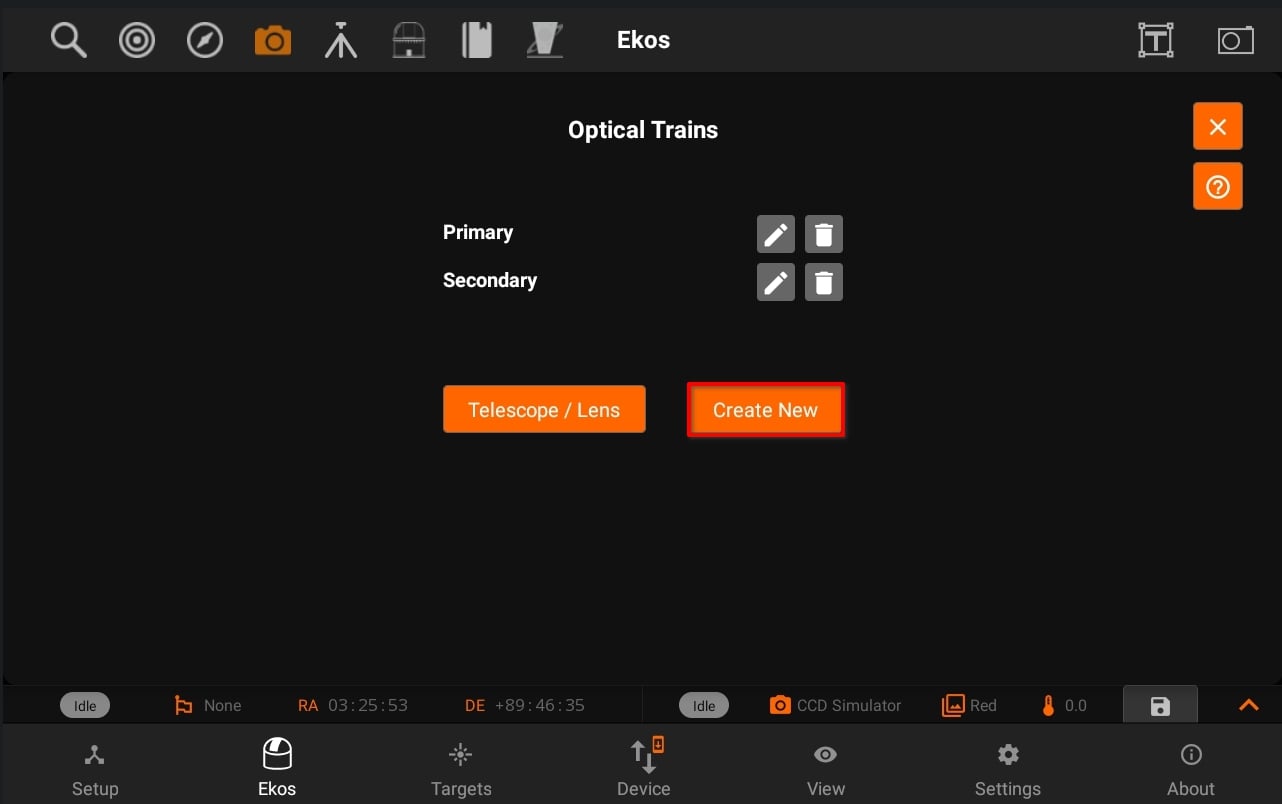
Tapping on Create new tocreates a new train with a "New Train" name of previous / default settings.
Telescope & Lens:
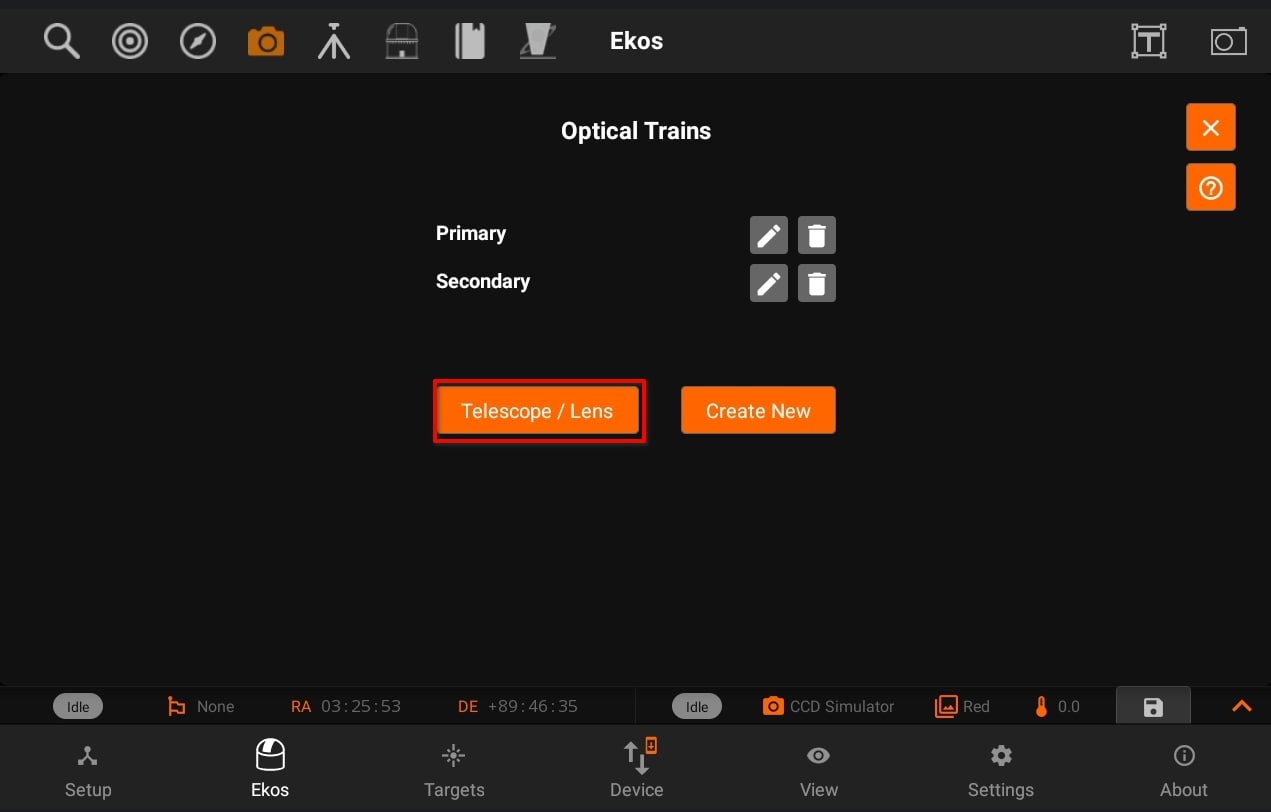
Displays Telescope / Lens View. So, you can Add / Update telescope and lens and then use those in different trains.
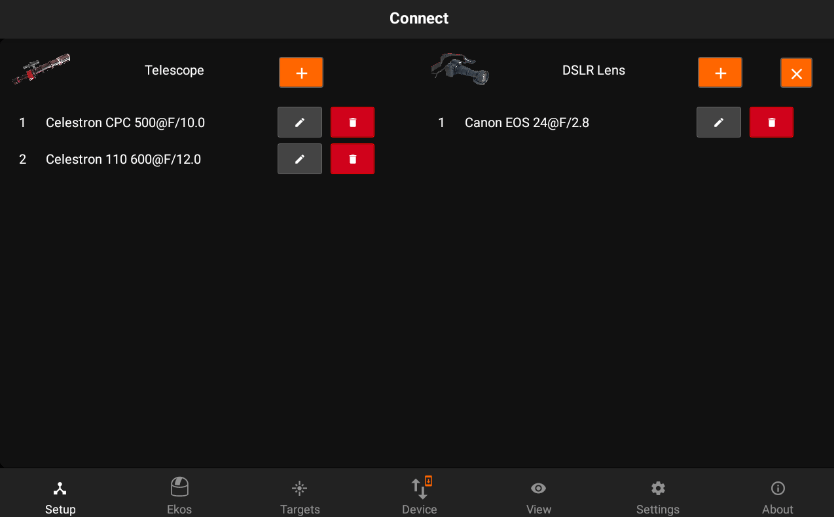
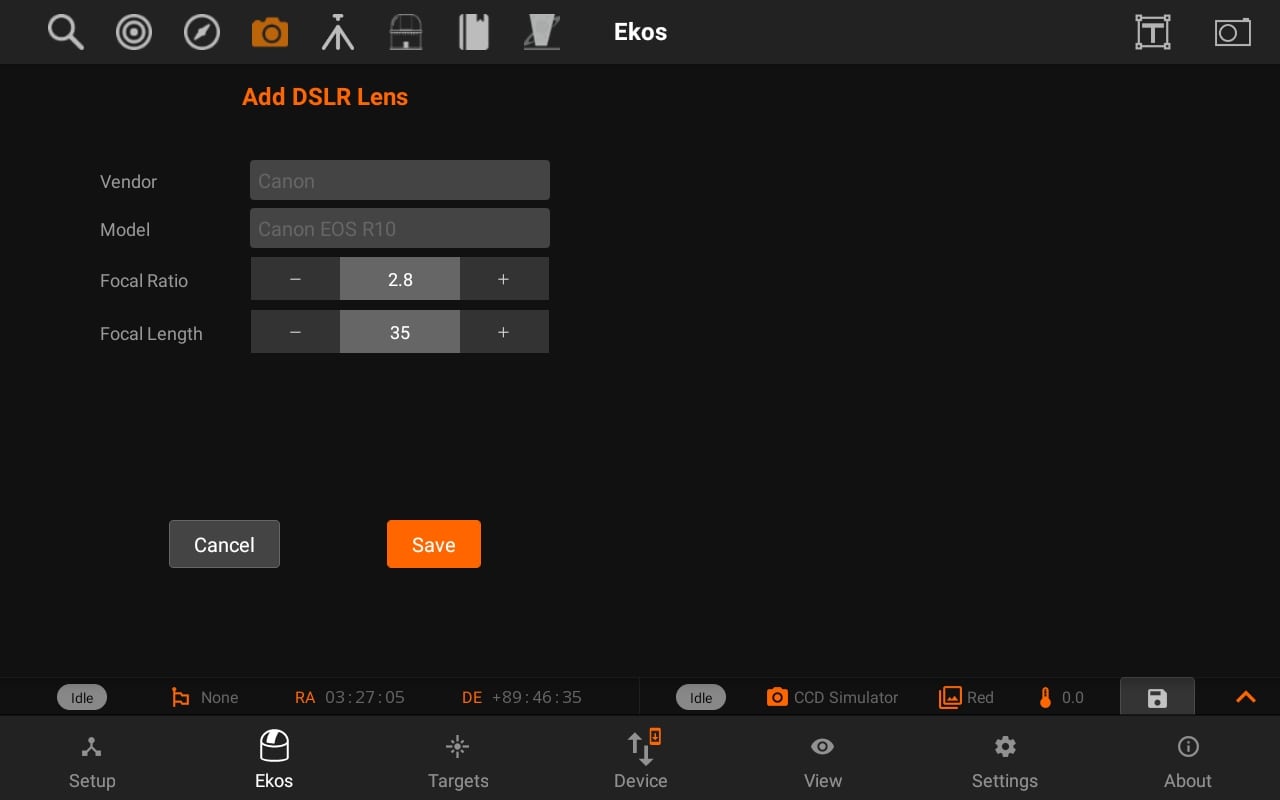
Tap on the Add/Edit button next to the telescope to edit the details of the telescope. All units are in millimeters.You can specify a Telescope and DSLR lens for your trains.
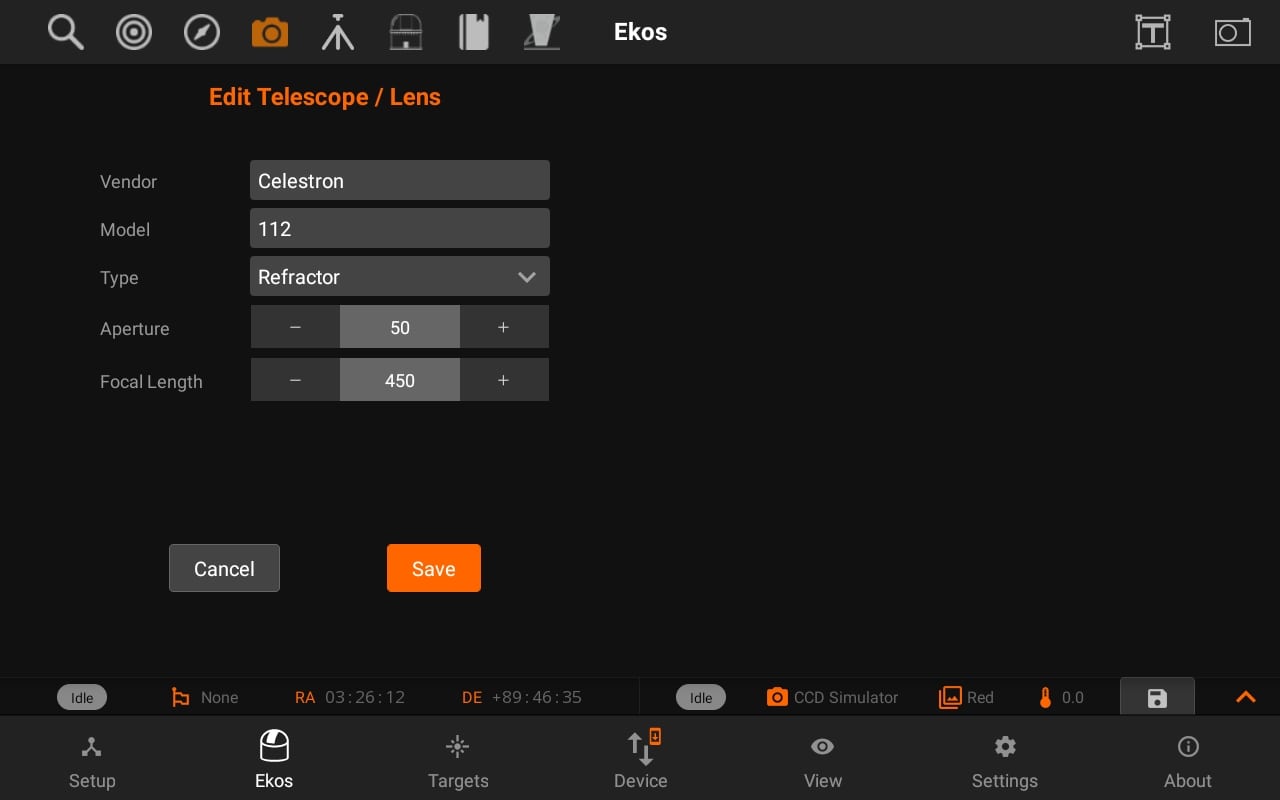
Similarly, you can add/edit DSLR lens and then use Scope/Lens in different Optical trains.
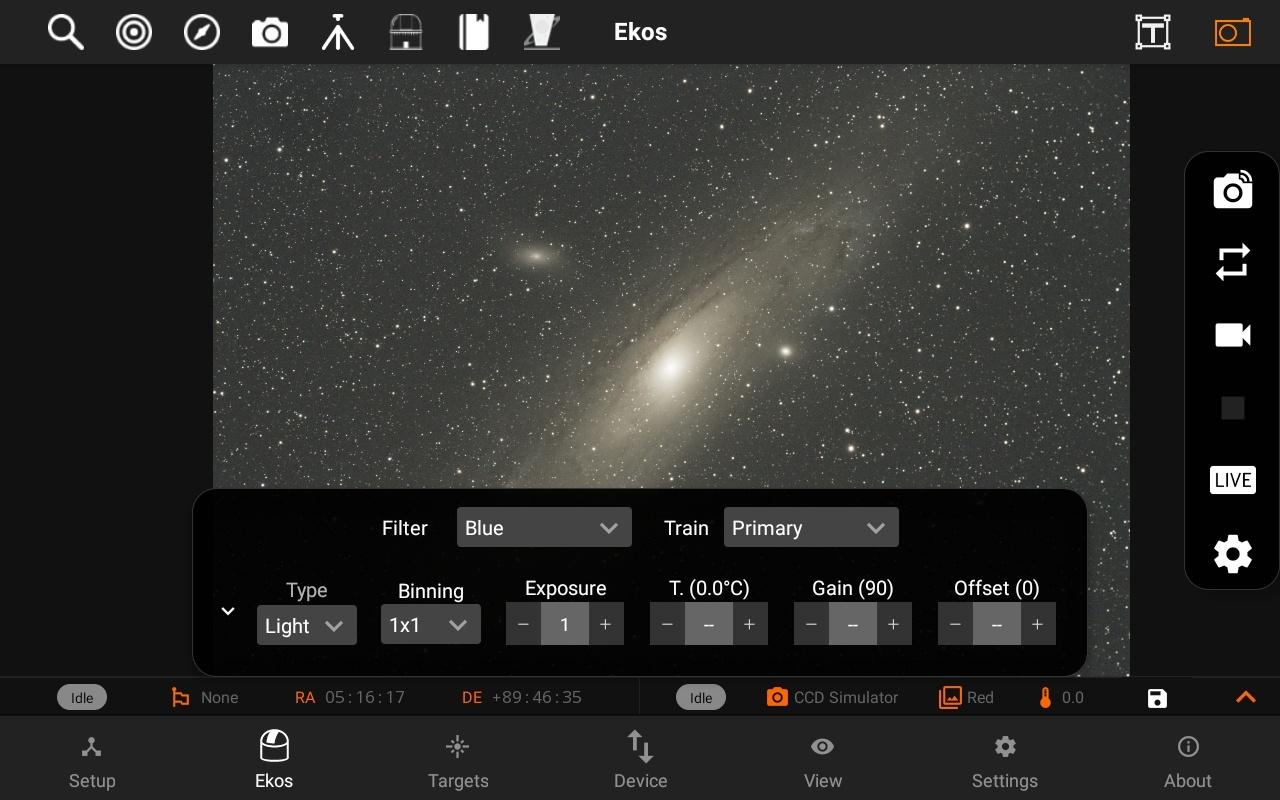
5.2. Ekos
When an equipment profile is started, the Ekos tab becomes active. In the Ekos screen, you can capture images, stream video, and create image sequences. Checkout the Online Manual for complete documentation on the Ekos modules. Currently supported functionality:
- Mount GOTO/Sync
- Mount Directional Pad Control
- Camera Settings
- Scheduler
- Guiding
- Focusing
- Live Stacking
- Alignment
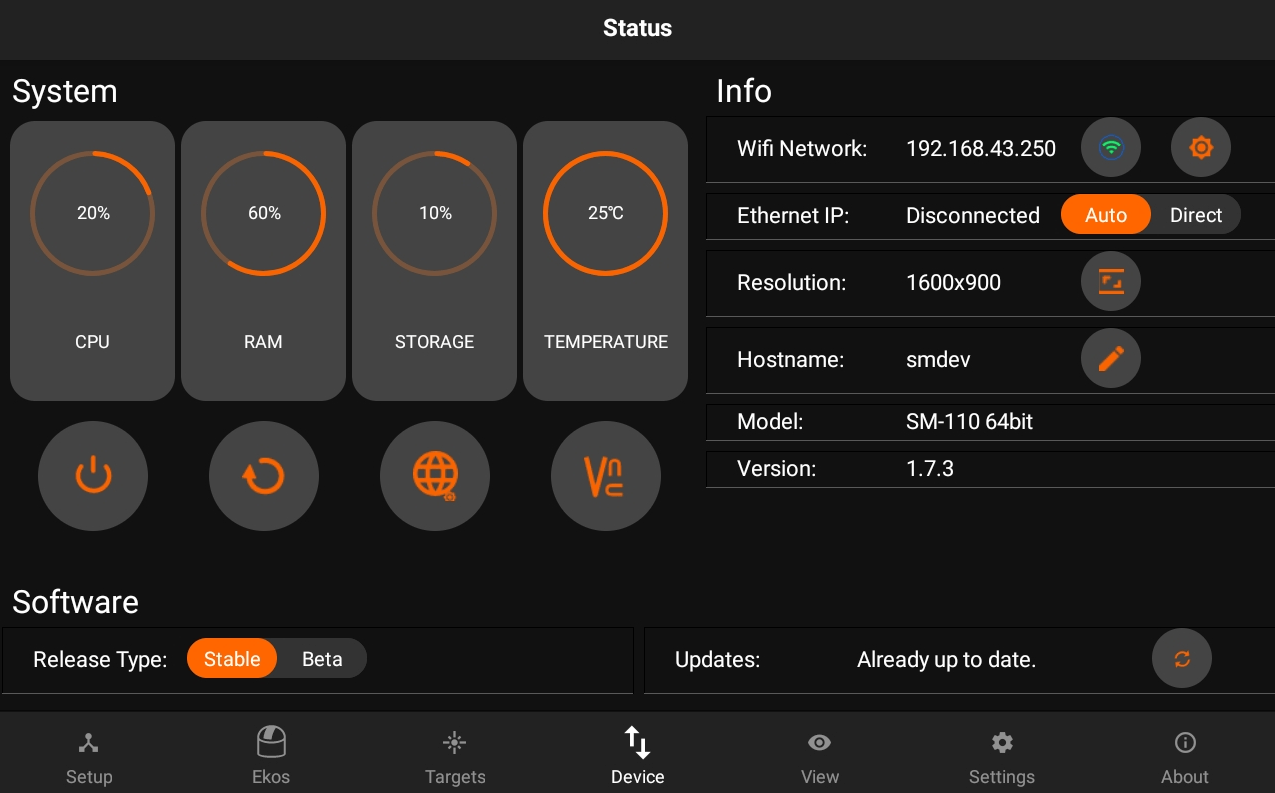
5.3. Device Status
The Device tab shows the health and information of your StellarMate. If StellarMate is connected to the internet, you can also run the software updater and install the latest firmware updates.
When accessing StellarMate directly via Hotspot (Access Point), the unit IP address is always 10.250.250.1. Therefore, if you are having issue accessing the unit via its hostname, you can simply use the IP address in your browser to access StellarMate Web Manager (http://10.250.250.1:8624).
You can perform the following functions:
- Change Name: You can change device name (and its hostname) to another name without any spaces. For example, if you rename it to myobservatory, the host name shall be changed to http://myobservatory.local.
- Change IP
- Connect to WiFi / Forget WiFi
- Connect to Home WiFi: Select a WiFi network as detected by StellarMate and then supply the password if it is protected. After a successful connection, please wait up to 2 minutes before using any of the unit functions again.
- Forget WiFi: WiFi network information is removed and StellarMate reverts to HotSpot mode (IP Address 10.250.250.10). If the Unit is connected to your LAN via Ethernet, you can still access it via its LAN IP address like before.
- Access Web Manager
- Access VNC Viewer
- Restart Device
- Shutdown Device
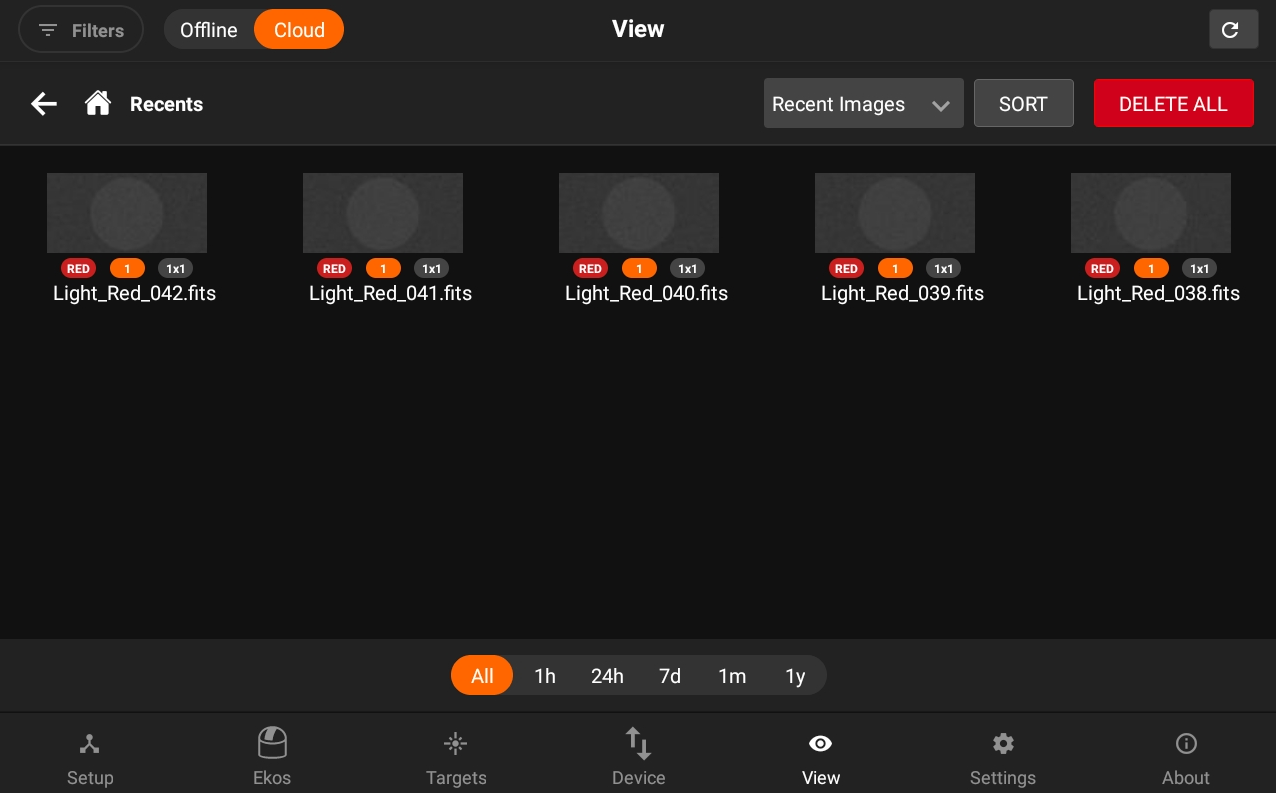
5.4. Cloud
The Cloud tab displays your images saved on the cloud (requires EkosLive Pro subscription, refer to Resources section) and it also displays offline images captured on StellarMate. All metadata are preserved so you can sort and search your images at any time.
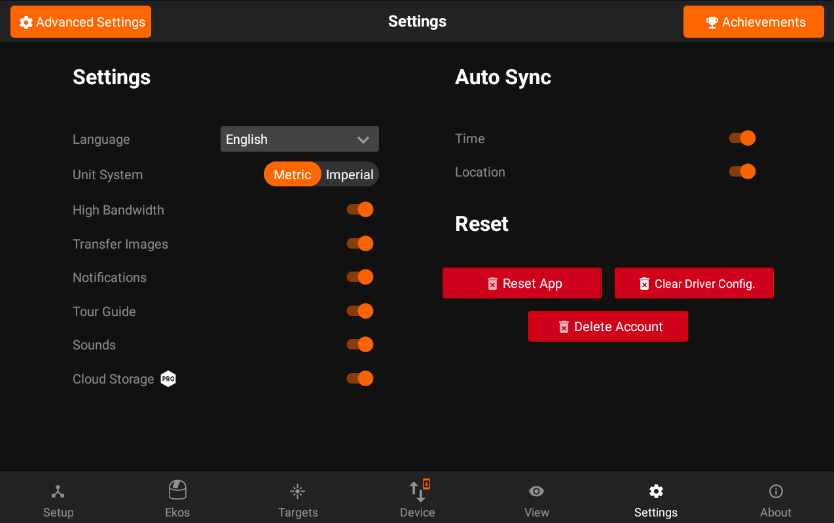
5.5. Settings
Adjust the SM App options by going to the Settings tab where you can change the following options:
- Language
- High Bandwidth mode
(not recommended on slow WiFi connections) - Transfer Images
- Notifications
- Sounds
- Cloud Storage (requires EkosLive Pro subscription, refer to Resources section)
In case the SM App becomes unresponsive, you can wipe all the settings by tapping on the Reset App button on the settings page. Close the App afterwards then re-launch it. You can always log back into you account in order to use StellarMate App.
6. Resources
YouTube Videos
EkosLive Pro
7. Warranty & Support
1 Year Limited Warranty. 1 Year support via online support portal at StellarMate website.
Contact Support
Website: https://www.stellarmate.com/support.html
Email: