


There are two methods to backup and restore StellarMate. You can do so using either the StellarMate Dashboard or by copying the contents of your sd card to a backup storage.
The backup contains all the following:
KStars:
- Profiles
- Settings
- Downloaded data files (including Astrometry).
INDI:
- Driver Settings
- Parking Info
- Serial Device Mappings
Method 1: Using the Dashboard
1) Go to stellarmate.local.

2) Head to the Diagnostics page.
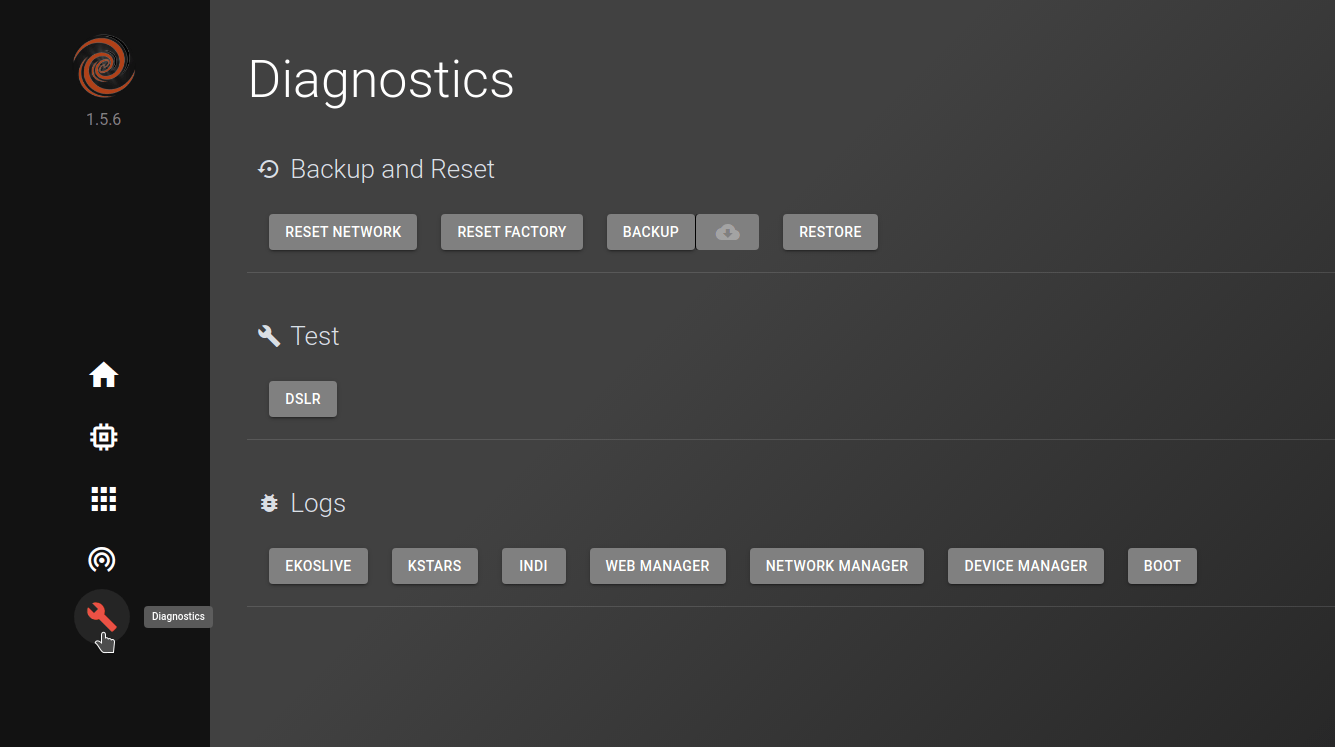
3) Click on "BACKUP" and wait for it to create a backup.
4) Once you get the message "Backup successful!", you can click on the download button next to backup to select your image and download it to your computer.
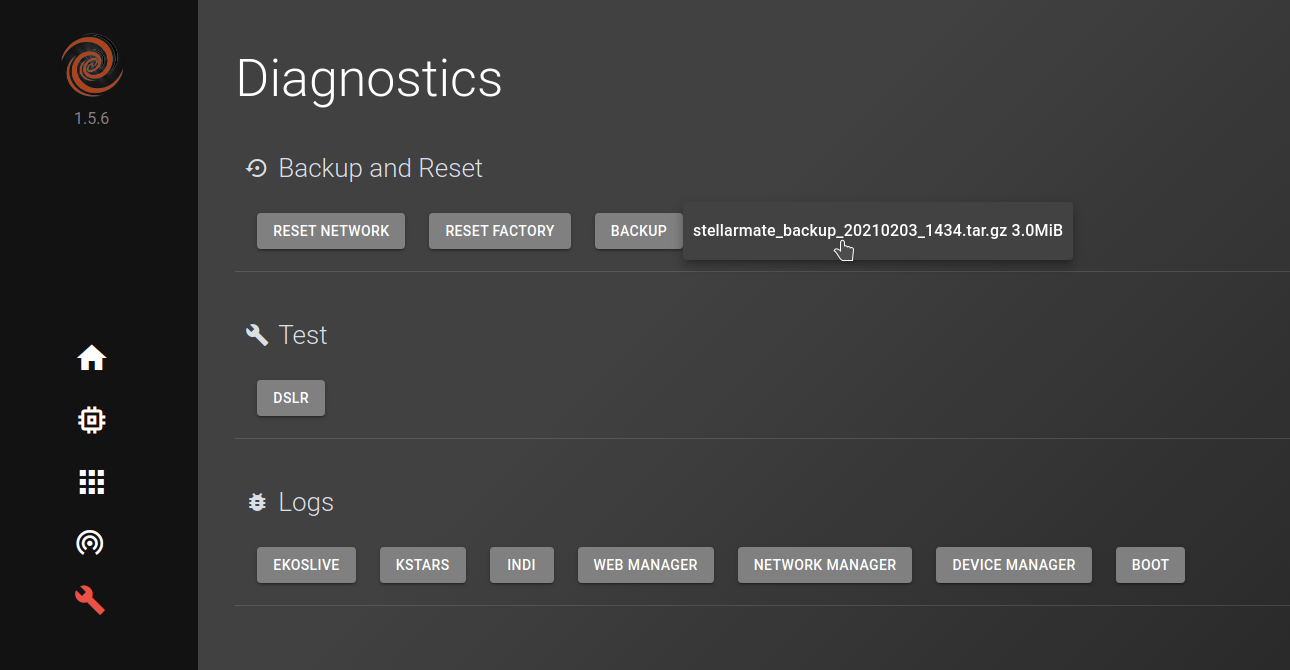
5) You have now successfully created a back up for your StellarMate! Now whenever you want to restore your StellarMate click on "RESTORE" and select the file you have downloaded and wait for it to complete, and you are done!
Method 2: Using an SD card reader
The backup and restore method is different depending on the Operating System of your machine. The created image will be equal to the size of the SD card (for example, a clone of a 32GB SD card with 20GB content will be 32GB) but on Linux, it can be shrunk to the size of its contents using PiShrink.
Windows:
Backup on Windows
1) Download and install win32DiskImager.
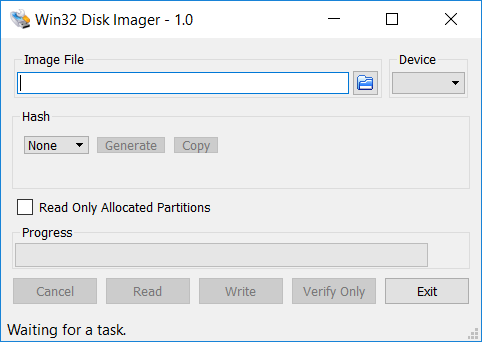
2) Choose the backup location and name (.img) in "Image File", select your inserted SD card Drive letter in "Device".
3) Start creating the image by pressing "Read".
4) Once complete your backup will be created at the specified location in "Image File".
Restore on Windows
1) Open Win32DiskImager, and select the backup image in "Image File" and select the SD card drive in "Device".
2) Start the restore process by clicking on "Write".
3) Once it is done, your StellarMate is restored and you can remove the SD card from your computer.
MacOS:
Backup on MacOS
1) Find your device name using the command:
diskutil list
Your SD card size will be somewhat smaller than your SD card size. It may have a name similar to disk1, disk2, disk3, etc...
2) Once found, the device path will be something like /dev/disk5, where disk5 is the device name
3) Before copying the SD card, it must be unmounted. Run the following command to make sure it is unmounted:
diskutil unmountDisk /dev/disk5
4) run the following dd command to copy the SD card replacing /dev/disk5 with your SD card path name and image_name with your preferred image name. Be careful with using dd and double-check your command as it could destroy data.
sudo dd if=/dev/disk5 of=~/image_name.img
Once complete, you will have created a backup image in your home directory.
Restore on MacOS
1) Find your device name using the command:
diskutil list
Your SD card size will be somewhat smaller than your SD card size. It may have a name similar to disk1, disk2, disk3, etc...
2) Once found, the device path will be something like /dev/disk5, where disk5 is the device name
3) Before copying the SD card, it must be unmounted. Run the following command to make sure it is unmounted:
diskutil unmountDisk /dev/disk5
4) Copy the image from its file path using the same dd command but reversed:
sudo dd if=~/image_name.img of=/dev/disk5
Once complete, you will have successfully restored your StellarMate.