There are two methods to backup and restore StellarMate. You can do so using either the StellarMate Dashboard or by copying the contents of your sd card to a backup storage.

The backup contains all the following:

KStars:

  • Profiles
  • Settings
  • Downloaded data files (including Astrometry).

INDI:

  • Driver Settings
  • Parking Info
  • Serial Device Mappings


Method 1: Using the Dashboard

1) Go to stellarmate.local.

2) Head to the Diagnostics page.
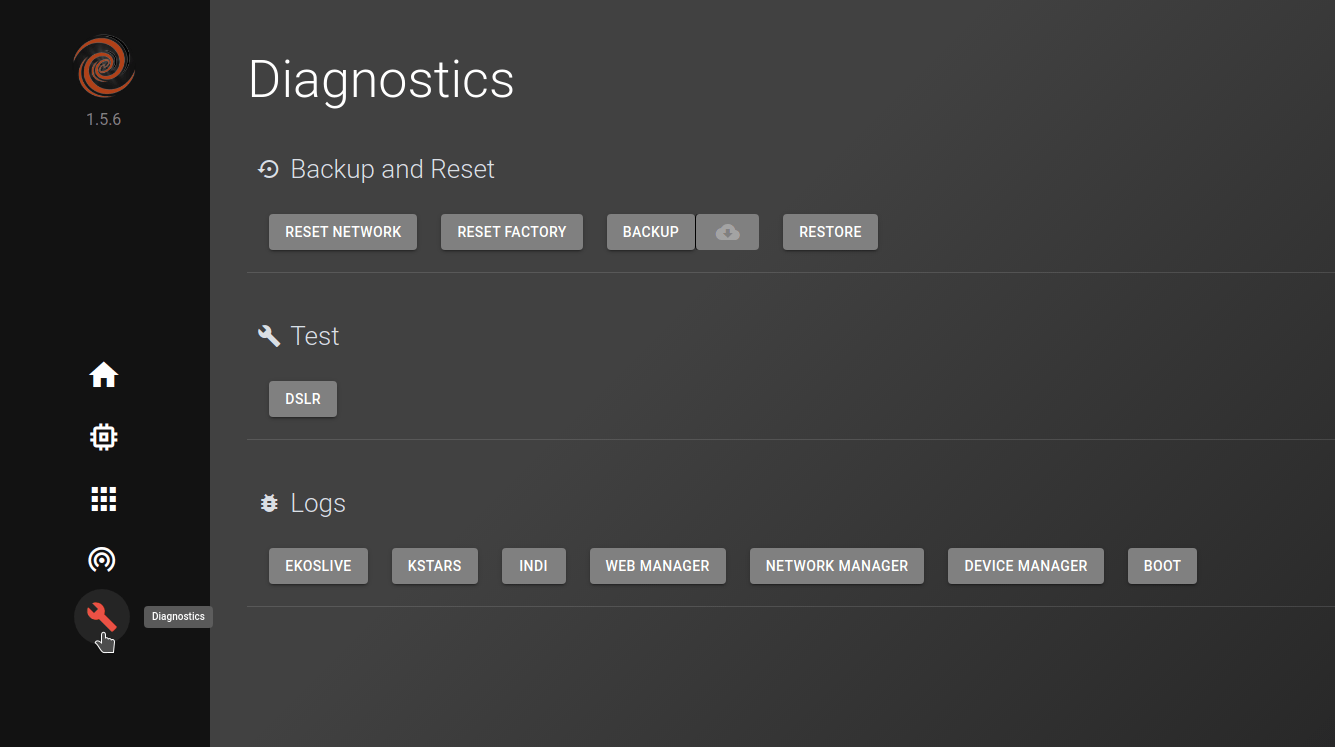
3) Click on "BACKUP" and wait for it to create a backup.

4) Once you get the message "Backup successful!", you can click on the download button next to backup to select your image and download it to your computer.
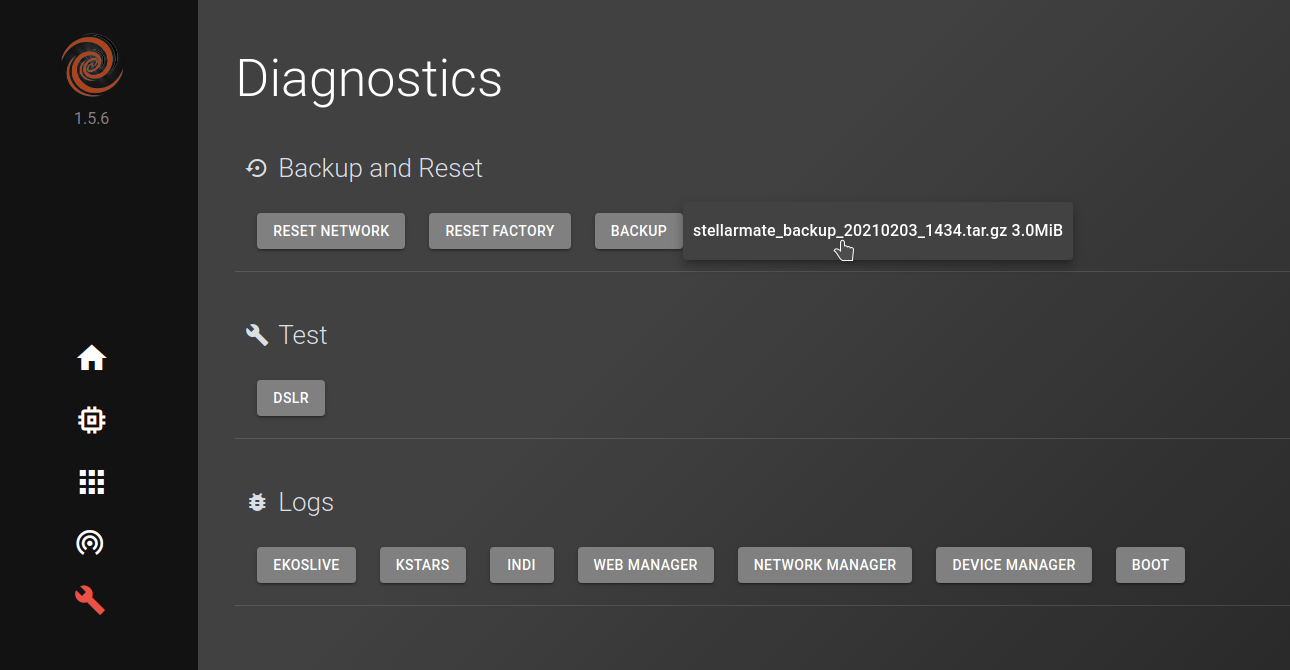
5) You have now successfully created a back up for your StellarMate! Now whenever you want to restore your StellarMate click on "RESTORE" and select the file you have downloaded and wait for it to complete, and you are done!


Method 2: Using an SD card reader

The backup and restore method is different depending on the Operating System of your machine. The created image will be equal to the size of the SD card (for example, a clone of a 32GB SD card with 20GB content will be 32GB) but on Linux, it can be shrunk to the size of its contents using PiShrink.

Windows:

Backup on Windows

1) Download and install win32DiskImager.
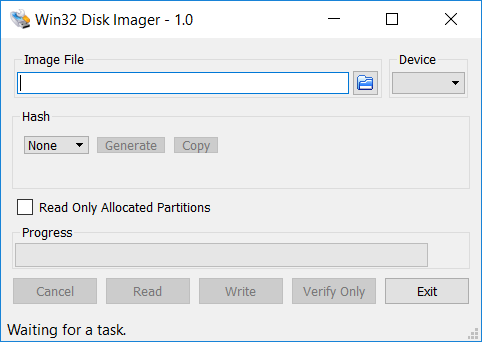
win32 disk imager

2) Choose the backup location and name (.img) in "Image File", select your inserted SD card Drive letter in "Device".

3) Start creating the image by pressing "Read".

4) Once complete your backup will be created at the specified location in "Image File".

Restore on Windows

1) Open Win32DiskImager, and select the backup image in "Image File" and select the SD card drive in "Device".

2) Start the restore process by clicking on "Write".

3) Once it is done, your StellarMate is restored and you can remove the SD card from your computer.

MacOS:

Backup on MacOS

1) Find your device name using the command:

diskutil list

Your SD card size will be somewhat smaller than your SD card size. It may have a name similar to disk1, disk2, disk3, etc...

2) Once found, the device path will be something like /dev/disk5, where disk5 is the device name

3) Before copying the SD card, it must be unmounted. Run the following command to make sure it is unmounted:

diskutil unmountDisk /dev/disk5

4) run the following dd command to copy the SD card replacing /dev/disk5 with your SD card path name and image_name with your preferred image name. Be careful with using dd and double-check your command as it could destroy data.

sudo dd if=/dev/disk5 of=~/image_name.img

Once complete, you will have created a backup image in your home directory.

Restore on MacOS

1) Find your device name using the command:

diskutil list

Your SD card size will be somewhat smaller than your SD card size. It may have a name similar to disk1, disk2, disk3, etc...

2) Once found, the device path will be something like /dev/disk5, where disk5 is the device name

3) Before copying the SD card, it must be unmounted. Run the following command to make sure it is unmounted:

diskutil unmountDisk /dev/disk5

4) Copy the image from its file path using the same dd command but reversed:

sudo dd if=~/image_name.img of=/dev/disk5

Once complete, you will have successfully restored your StellarMate.


Follow these 5 steps to import mosaic settings from Telescopius.com to StellarMate App.
StellarMate App optimizes the mosaic information further by minimizing movements when slewing across panels.
Start jobs to begin tracking, focusing, alignment, guiding, and capture operations in one click!
 
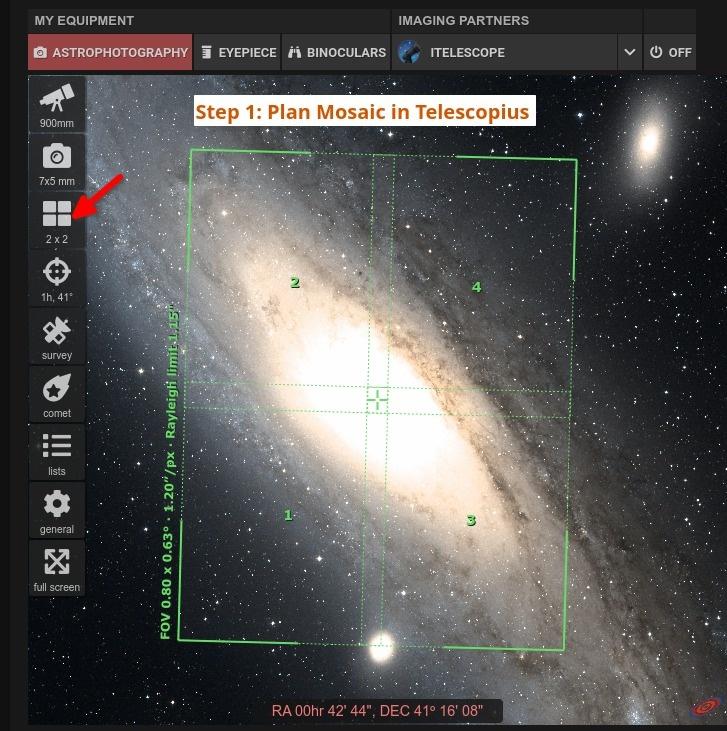
1.   Plan Mosaic in Telescopius

plan mosaic 1
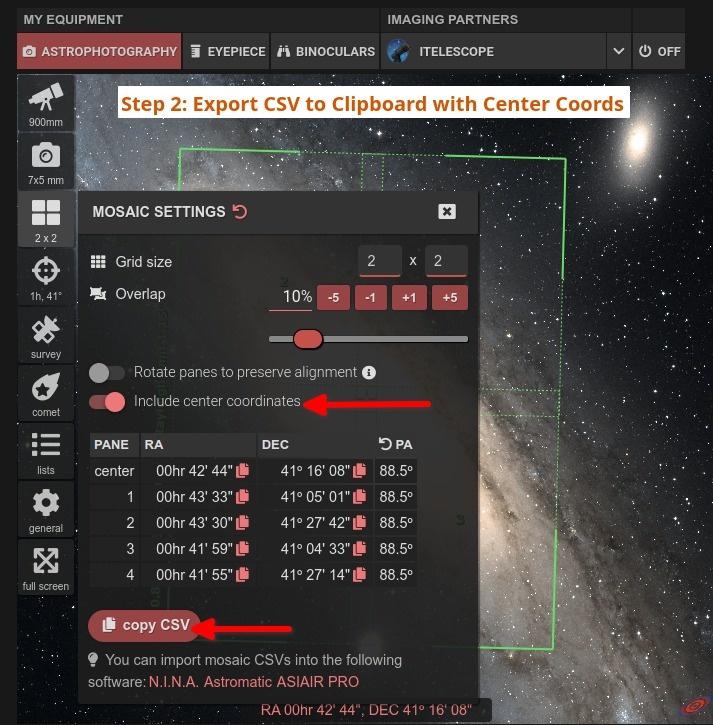
2.   Export CSV to Clipboard with Center Coords
 
export csv 2
 
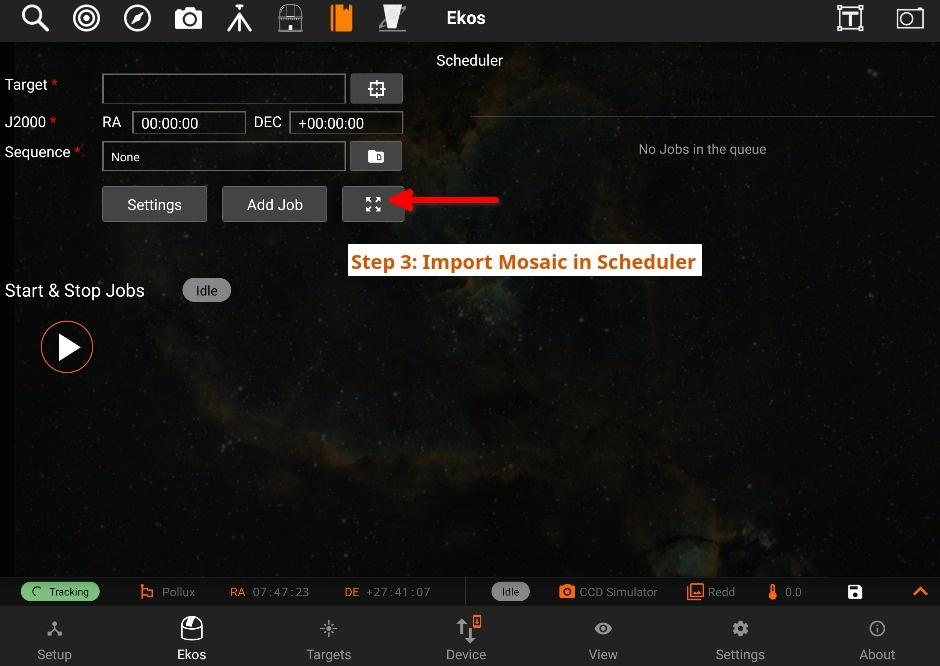
3.   Import Mosaic in Scheduler.
 
import mosaic 3
 
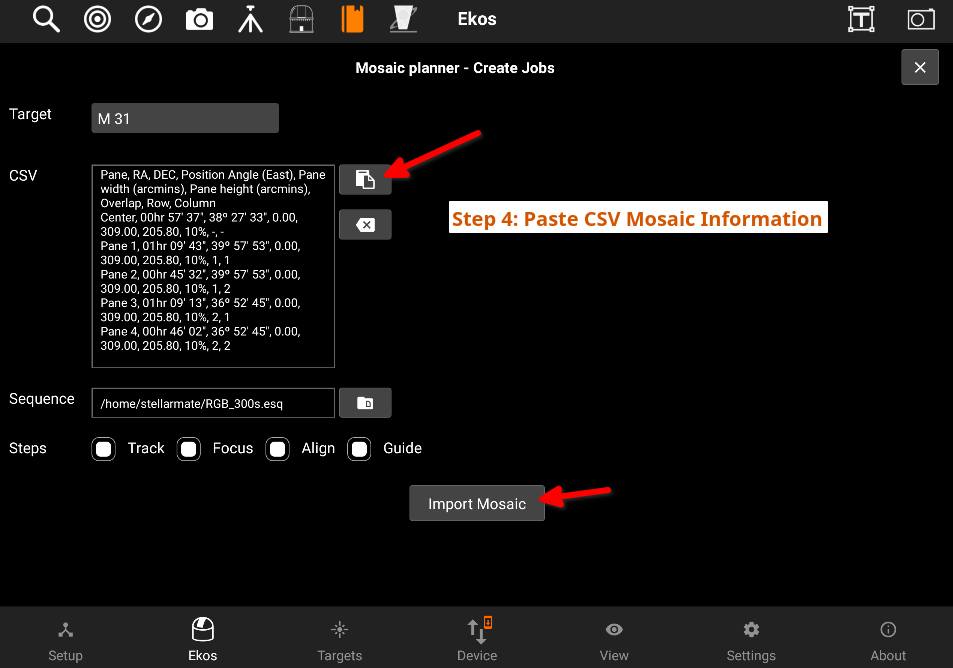
4.   Paste CSV Mosaic Information
 
mosaic paste 4
 
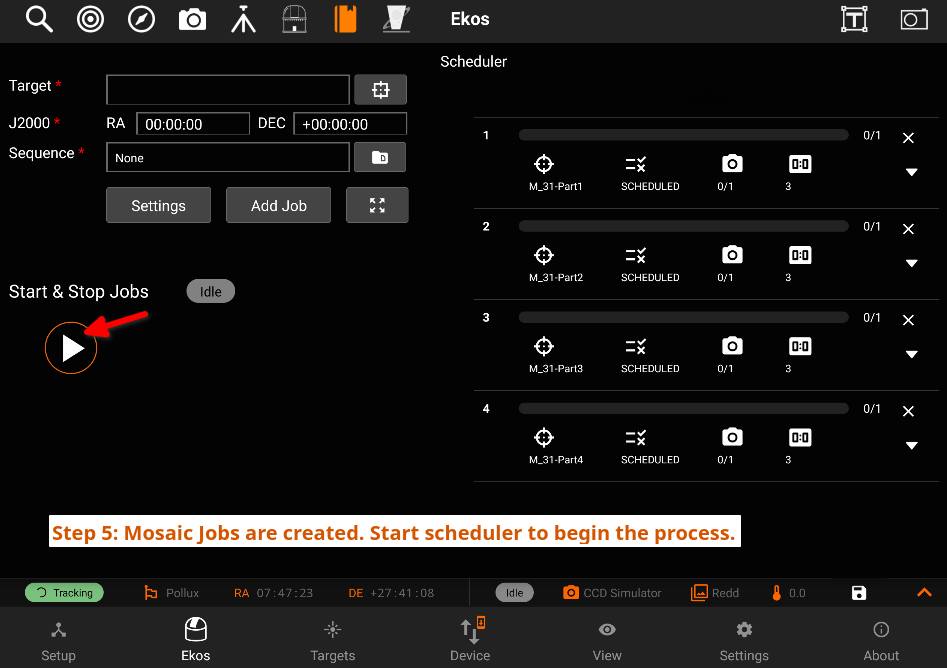
5.   Mosaic Jobs are created. Start scheduler to begin the process.
 
mosaic jobs 5
 

StellarMate allows connecting bluetooth mounts easily through StellarMate Web Manager, all you have to do is follow these steps:

Connecting to a Bluetooth Device

1. Open StellarMate Web Manager

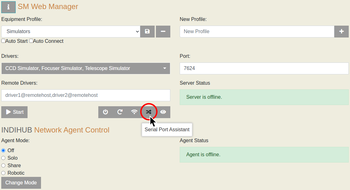
2. Click on Serial Port Assistant  random solid

serial port assistant click

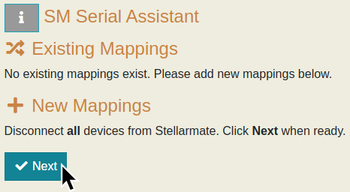
3. Click on  Next.

next

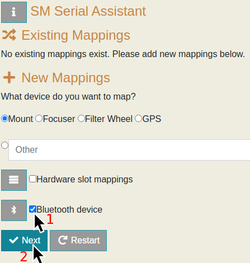
4. Check the  Bluetooth device checkbox, and then click  Next.

bluetooth check

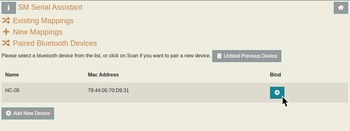
5. If you have already paired your device to StellarMate before, you can set it to Auto-bind on startup by clicking on the Bind  button next to the device's details. You will be met with a dialog that confirms that your device has been binded to StellarMate.
bind paired

6. If you have not paired your device and would like to add a new device, click on the  Add New Device button.

add new device

7. The Bluetooth Wizard will now scan for available bluetooth devices.

scanning

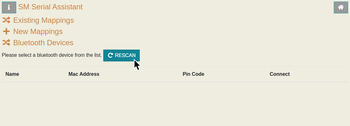
8. If the scanner does not find any devices, click on  RESCAN.

empty

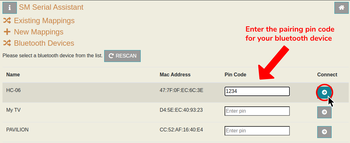
9. If you find your device, enter the pin code and then click on the Connect  button. (eg. Shoestring Astronomy HC-06's pin code is 1234, you can find the pin code number by finding the bluetooth device's documentation made by the manufacturer) 

connect

10. Wait a few seconds until a pop-up dialog shows up to confirm if the pairing and binding process was successful or not.


Unbinding a Bluetooth Device

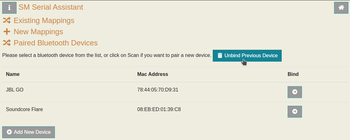
To stop a device from being auto-binded on startup, go to the Bluetooth Wizard by following steps 1-4 and then click on  Unbind Previous Device.

unbind

A confirmation dialog will be shown to you.


Stellarmate offers an application that makes it simpler for StellarMate users to send debug logs to StellarMate Developers. Ekos Debugger allows users to start up KStars and/or INDI and whenever an error occurs and/or a crash happens, users are able to save the logs and attach them to a ticket.

How to use Ekos Debugger

1. VNC into your StellarMate or use any other method to view the StellarMate Desktop.

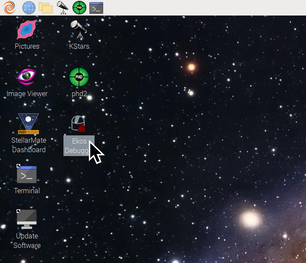
2. Double-click on the Ekos Debugger icon

ekosdebugger click

3. Ekos Debugger can be used to Debug either KStars/Ekos or INDI drivers. Decide which mode you want to run the debugger with. Each mode has its own tab in Ekos Debugger.

KStars

Select KStars if the crash occurs in KStars/Ekos (e.g KStars abruptly shuts downs and restarts).

INDI

Select INDI if you recieve messages that a particular driver crashes while using Ekos. For example, if the QHY driver crashes, you'd get a message that says that indi_qhy_ccd driver crashed. In this case, INDI driver needs to be debugged and not Ekos.

Debugging KStars

If you were asked to send logs for your mount, make sure both INDI + Drivers / Mount checkboxes are checked. For the camera, make sure both INDI + Drivers / Camera are checked and so forth. Do not forget to disable verbose logs when no longer needed as they can have a performance impact on the system.

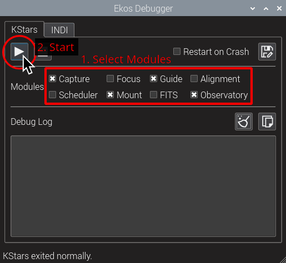
To debug KStars/Ekos crashes, make sure you are on the KStars tab and then select the modules that are usually crashing with your profile, and then click Start.

Note: You can click on the Restart on Crash checkbox to toggle the automatic reloading of KStars/INDI.

ekosdebugger kstars

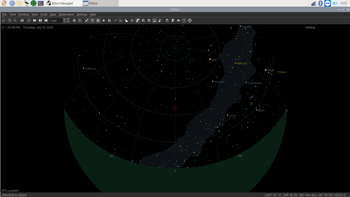
KStars/INDI should now be open, proceed with starting your profile and using StellarMate normally.

ekosdebugger kstars open

Debugging INDI

To debug INDI driver crashes, make sure you are on the INDI tab and then select the equipment profile and driver to debug.

ekosdebugger indi1. Select which equipment profile to debug.

2. Select which driver to specifically debug (e.g. Above we selected QHY CCD camera driver).

Then click the Start button to start INDI server debugging process. Once that is started, launch KStars and edit your equipment profile:

1. If your profile was set to Local, simply switch it to Remote and leave everything as is.

2. If your profile was already set to Remote, ensure the remote host is set to localhost and that INDI Web Manager button is unchecked.

ekosdeubbger indi profile

Save your equipment profile and then start it. Continue to use Ekos normally until you detect a driver crash. Send the crash logs as explained below.

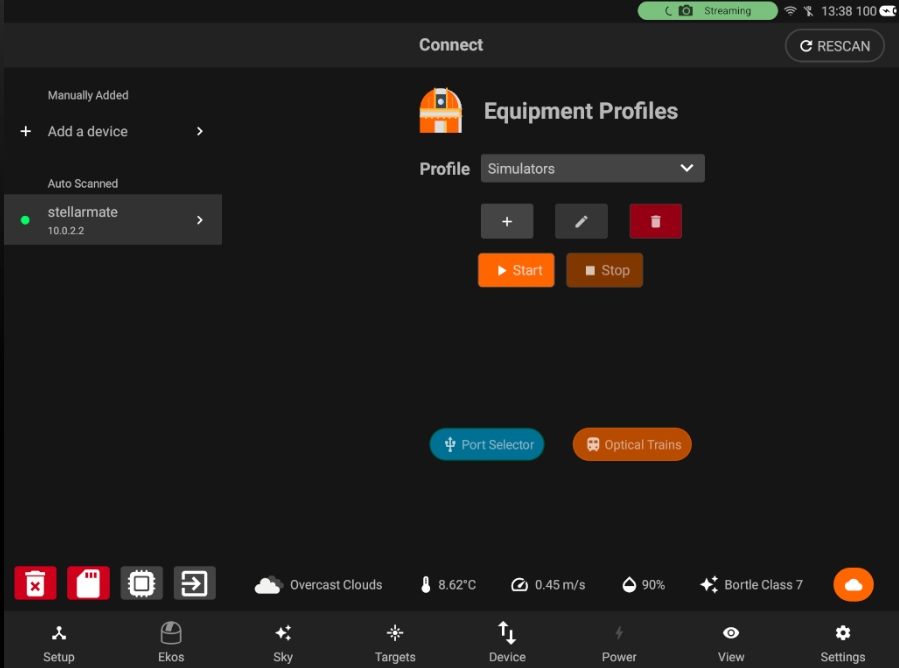
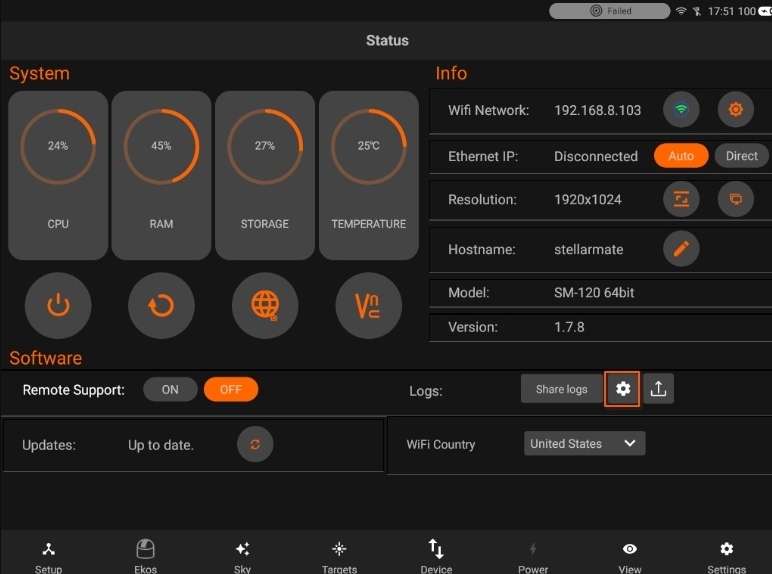
You can also set Log Settings from the StellarMate App. Make sure you are connected to StellarMate.
Device tab

In the Device tab, you can toggle the cog wheel button

toggle ekos logs

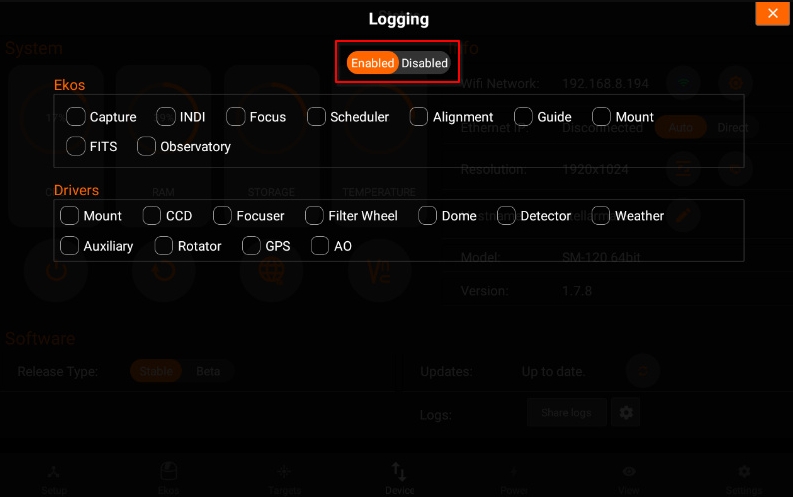
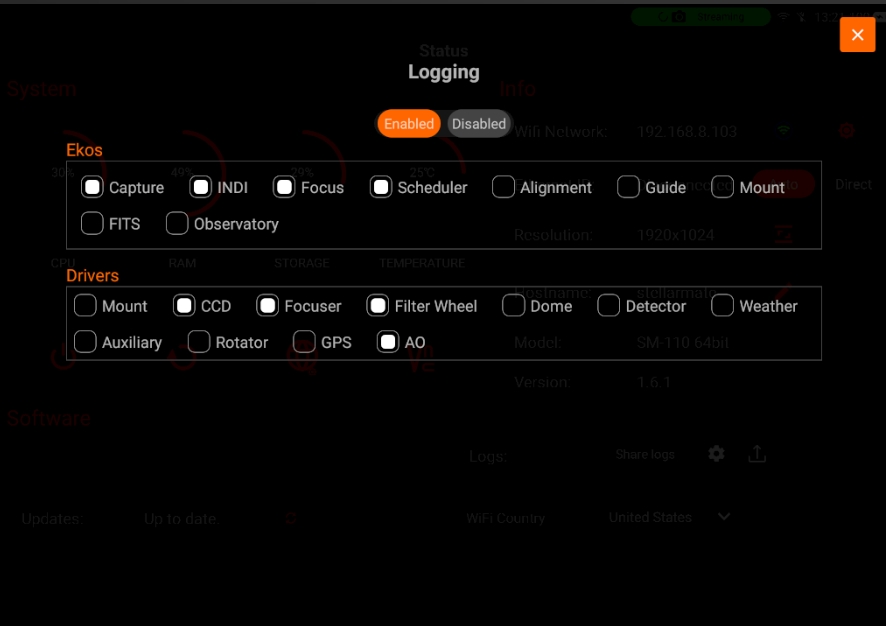
You can Enable/Disable and Enable the desired Logs for debugging.

ekos logs enabled 


ekos logs enabled


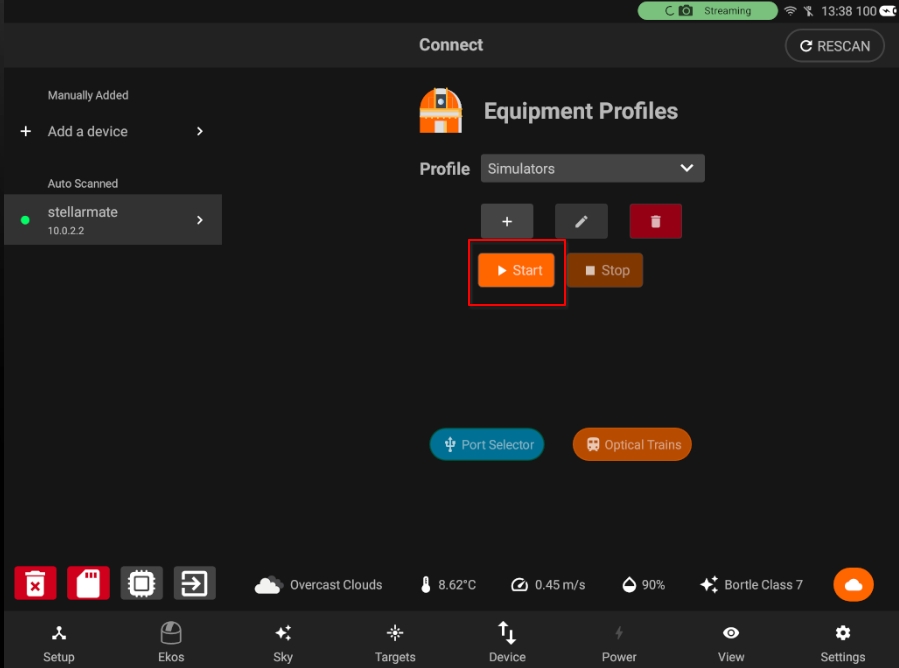
When the logs are enabled. Start the Ekos Profile

ekos profile start

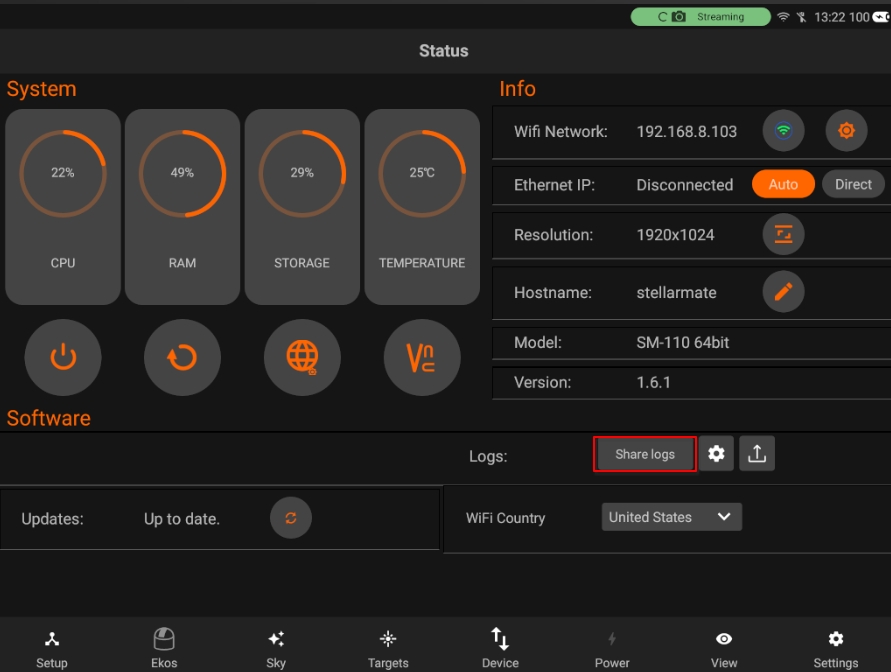
Once Debugging is completed, you can share the logs with SM support. Make sure your device has an active internet connection.

device share logs


The logs are uploaded now and you will see the pop-up notification. SM support will be able to investigate your issues

logs uploaded


Sending Crash Logs

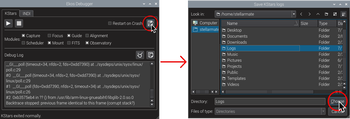
When KStars or INDI crashes, click on the Save Logs button and choose the folder where the logs will be saved.

ekosdebugger saveprocess

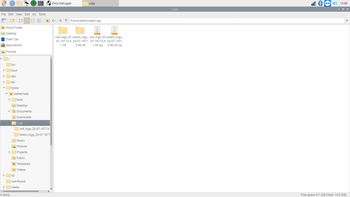
Navigate to your Logs folder in order to retrieve your logs.

ekosdebugger logs folder

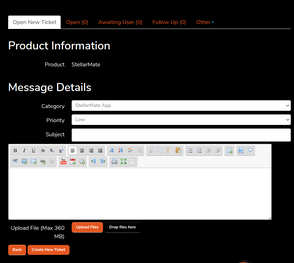
Next, you can now open a new ticket or go to your existing ticket, and attach the .zip log file by clicking on Upload Files to get support.

ekosdebugger ticket


You can also Set the set log 


StellarMate includes a Gigabit (1000Mb/s) Ethernet port. You can connect StellarMate to your home router. Alternatively, you can also directly connect StellarMate to your PC/Mac.

This can be done using a regular Ethernet cable, at home or in the field. Wired connections are very fast and highly reliable.
For users who prefer the wired solution, you can follow the video guide below to connect your StellarMate to PC/Mac.
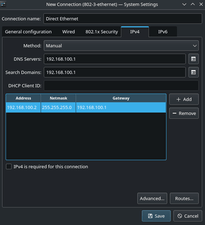
Linux users can use Network Manager to add a Manual connection for Direct Ethernet using the following settings.

Screenshot 20220828 162712